My MPV MOT - - Jobs to do list.
2 posters
Page 1 of 1
 My MPV MOT - - Jobs to do list.
Earlier this year between my Strokes at Easter and the Great Fire of Wroxall and getting infected with the Tick bite, my head lights decided to quit.
Not being in the best of Mot condition myself the job got put off. With nice long summer days and evenings I had to make sure that I was back home before dusk and just drive on sidelights.
Last winter my Rear Screen Wiper packed up and that got left " until the Summer". Well summer didn't exactly happen for me this year as many of you know.
After all the Tick Bite and Hospital escapades I didn't get any driving in until October. Don't know when they packed up,, but my wife noticed as I was reversing into the (drive at dusk) my number plate lights weren't working. What do they say about a Mechanics car ?? ( I refer to myself as a mechanic in the loosest of terms) Always the last car to get worked on.
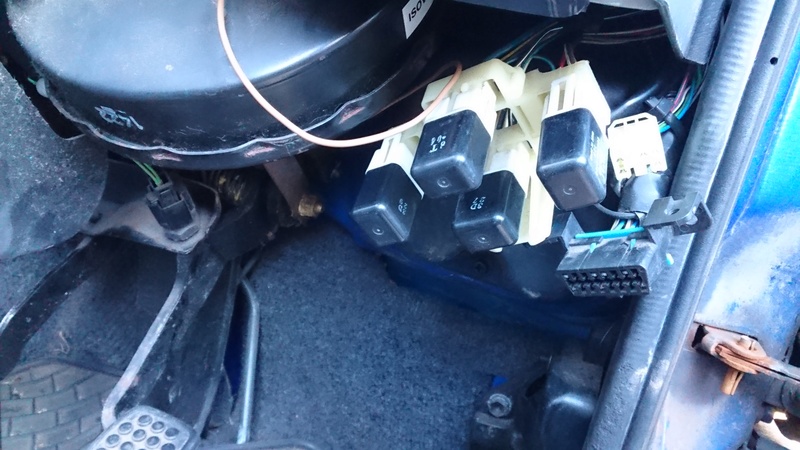
So last week the Mot ran out as did the Road Fund Licence so had to SORN it and get on with the needy jobs. First thing was to decide whether it was the Column Dipswiptch that was faulty or the Headlight relay stuck right up under the dashboard where it is almost impossible for me to get my Mobile Beartraps on the little beggars. There are four Relays up under there and the Headlight Relay wasn't clicking, Fuel Pump one was and what the other two do I guess only Matt knows.
I decided to double check the easy option again - - the fuses. At least I can undo the one 8mm setscrew and drop the whole lot down and use a Fuse Puller to re-check what I had already checked several times, but no that was too easy.
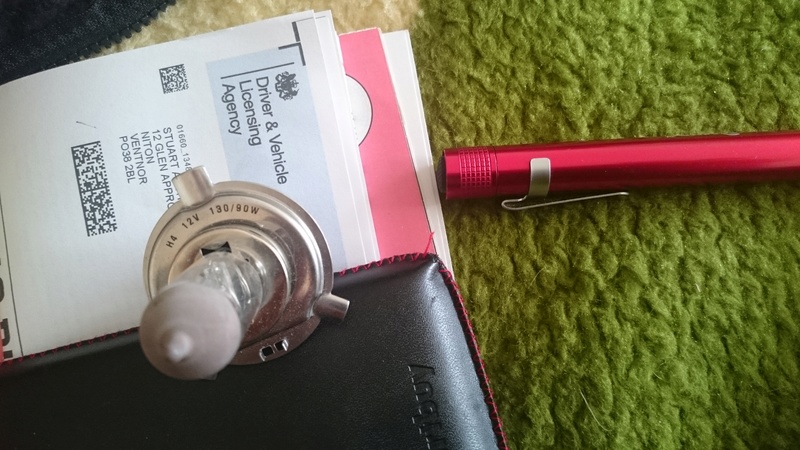
When I had the lights turned on, I noticed that the Main Beam Light on the speedo was on whether the Dipswiptch was on dip or main beam. Could my 130/90watt. H4 bulbs have burned out the contacts on the Dipswiptch. So one massive battle to get at the connections up under the dash.. What a pig of a job!! . Connected in another switch assembly and still the same problem. So changed it all back again.
Must be the Relay. Can't be anything else he says very hopefully after all this mucking about.
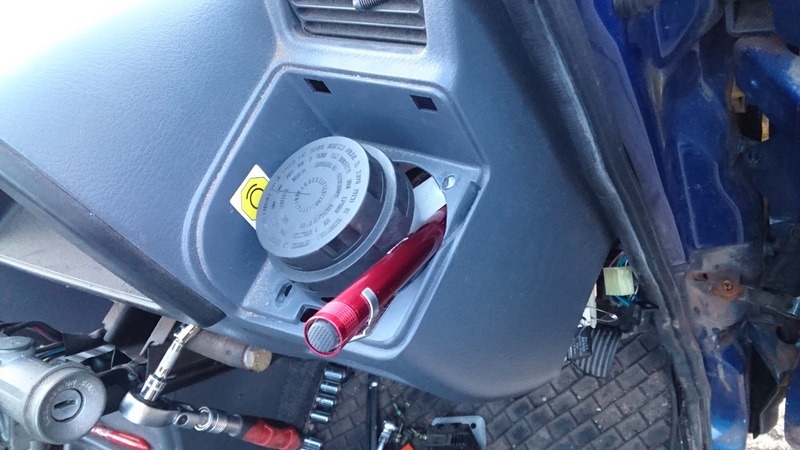
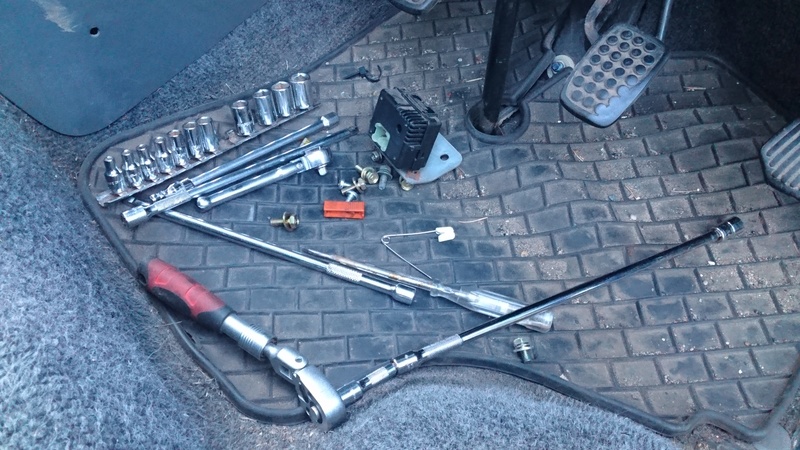
Absolutely dreading doing this job. I removed the three Rocker switches and undid the Brake Fluid Reservoir and moved it over so I could squeeze an LED Pencil Torch in the gap to shine it on the Relay Cluster. 1 quarter inch drive ratchet and two extensions and an 8mm socket poked through one of the switch apertures and the assembly was off . Piece of cake. But mine being LPG, there are a few more tentacles trailed about up under the dashboard. But with a bit of gentle persuasion out they came to just below the dashboard......
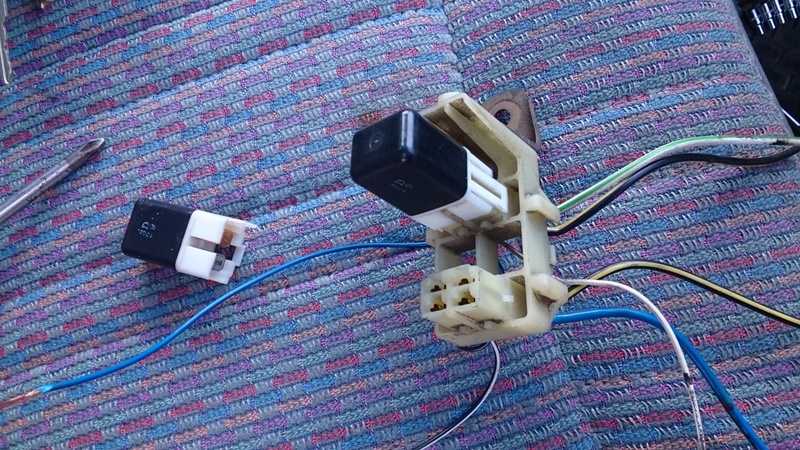
Turned the ignition on and found out which one was the Fuel Pump Relay. Remove the next one and put it in an old Relay Holder and flashed the two wires across a battery and that one worked, so onto Relay number 3. Same tests and that one worked. Murphy's law dictates it is the last one you try - - and Yippee - - it was faulty. Dead as the Parrot in the Monty Python sketch. So put in another tested and working Relay and guess what?? It was the ruddy Relay all along.
Now dreading putting it all back together. Getting that piddling little 8mm setscrew back in balanced in the end of a tiny socket on two Wobble Bars with my right hand, whilst l held the Relays up under the Dash would be a NIGHTMARE. WRONG!! I couldn't believe it, but it went straight back in the threads in the bodywork first try. Fantastic. Another ten minutes and all the switches, fuses, Column Cowel were back in place. One job done. Four more to go. Phew!!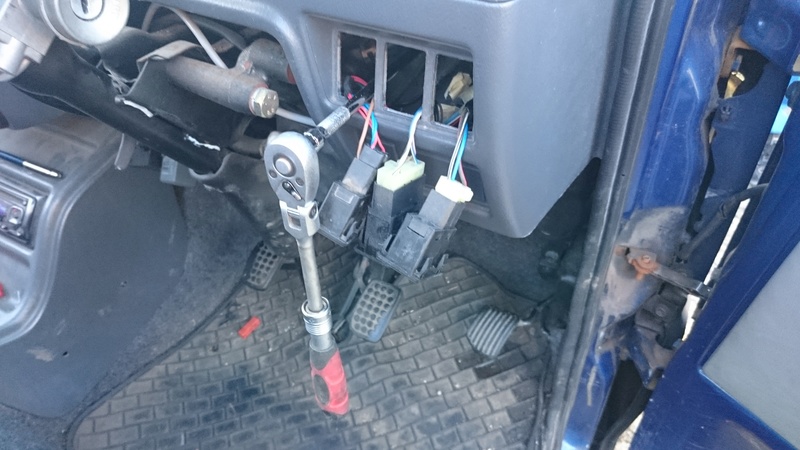

Not being in the best of Mot condition myself the job got put off. With nice long summer days and evenings I had to make sure that I was back home before dusk and just drive on sidelights.
Last winter my Rear Screen Wiper packed up and that got left " until the Summer". Well summer didn't exactly happen for me this year as many of you know.
After all the Tick Bite and Hospital escapades I didn't get any driving in until October. Don't know when they packed up,, but my wife noticed as I was reversing into the (drive at dusk) my number plate lights weren't working. What do they say about a Mechanics car ?? ( I refer to myself as a mechanic in the loosest of terms) Always the last car to get worked on.
So last week the Mot ran out as did the Road Fund Licence so had to SORN it and get on with the needy jobs. First thing was to decide whether it was the Column Dipswiptch that was faulty or the Headlight relay stuck right up under the dashboard where it is almost impossible for me to get my Mobile Beartraps on the little beggars. There are four Relays up under there and the Headlight Relay wasn't clicking, Fuel Pump one was and what the other two do I guess only Matt knows.
I decided to double check the easy option again - - the fuses. At least I can undo the one 8mm setscrew and drop the whole lot down and use a Fuse Puller to re-check what I had already checked several times, but no that was too easy.
When I had the lights turned on, I noticed that the Main Beam Light on the speedo was on whether the Dipswiptch was on dip or main beam. Could my 130/90watt. H4 bulbs have burned out the contacts on the Dipswiptch. So one massive battle to get at the connections up under the dash.. What a pig of a job!!
Must be the Relay. Can't be anything else he says very hopefully after all this mucking about.
Absolutely dreading doing this job. I removed the three Rocker switches and undid the Brake Fluid Reservoir and moved it over so I could squeeze an LED Pencil Torch in the gap to shine it on the Relay Cluster. 1 quarter inch drive ratchet and two extensions and an 8mm socket poked through one of the switch apertures and the assembly was off . Piece of cake. But mine being LPG, there are a few more tentacles trailed about up under the dashboard. But with a bit of gentle persuasion out they came to just below the dashboard......
Turned the ignition on and found out which one was the Fuel Pump Relay. Remove the next one and put it in an old Relay Holder and flashed the two wires across a battery and that one worked, so onto Relay number 3. Same tests and that one worked. Murphy's law dictates it is the last one you try - - and Yippee - - it was faulty. Dead as the Parrot in the Monty Python sketch. So put in another tested and working Relay and guess what?? It was the ruddy Relay all along.
Now dreading putting it all back together. Getting that piddling little 8mm setscrew back in balanced in the end of a tiny socket on two Wobble Bars with my right hand, whilst l held the Relays up under the Dash would be a NIGHTMARE. WRONG!! I couldn't believe it, but it went straight back in the threads in the bodywork first try. Fantastic. Another ten minutes and all the switches, fuses, Column Cowel were back in place. One job done. Four more to go. Phew!!


Guest- Guest
 Re: My MPV MOT - - Jobs to do list.
Glad to see you are getting your elbows greased again after all that shit you went through.
Are the lights (not just the headlights, but all of 'em) always such a problem? Because mine has had a few hiccups with the sidelights, the fog light, the blinker, the reverse light... But they all started to work again out of nowhere after a few days. Problems never came back, just a different light that fails (and miraculously unfails again) from time to time.
Oh and you are using the same led light as I. You should take off the clip and put it on backwards. That way you can fix it to the visor of a baseball cap and use it as a headlight.
 Re: My MPV MOT - - Jobs to do list.
Always a Minefield with Electrical faults, as I found out when after putting the Dash back together.
Were my woes over? Nope. Nearside Headlight was glowing like a candle on both Dip and Mainbeam. That presumably is a poor earth or poor connection on the H4 bulb. The Daihatsu connector is pretty poor quality and have seen lots of them with the spade connectors corroded away.
First place I would try Lex is the Fuse box. With the symptoms you describe it sounds like it could be a poor connection in there.
Undo the setscrew and drop the fusebox down. Check and make sure that the fuses are a nice tight fit in the terminals, particularly the lighting ones. If not, it is a bit of gentle bending the terminals with a small Electricians Screwdriver and replacing the fuse and see if it is a better fit.
One thing I didn't mention in the above post was removing the Relays from the holder without snapping off the plastic clips. I use a couple of Safety Pins to hold the Clips clear of the lugs. Then the Relay can be removed without damaging them.
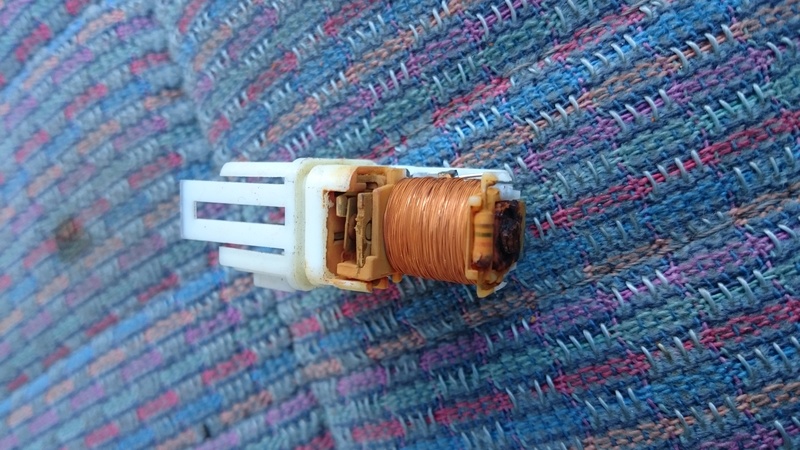
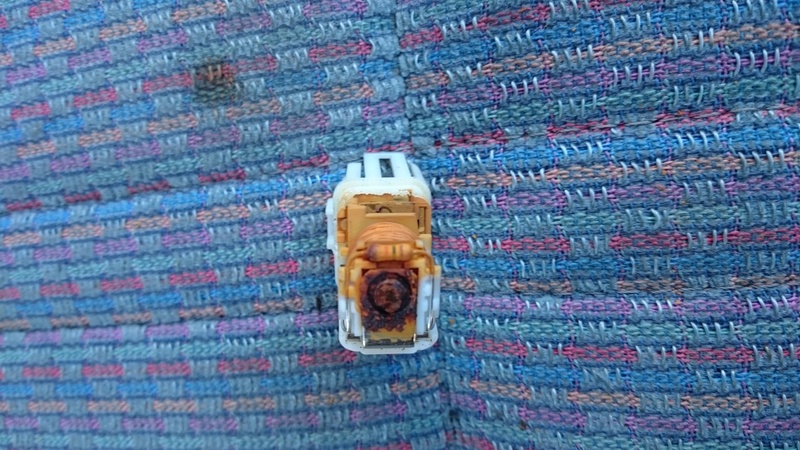
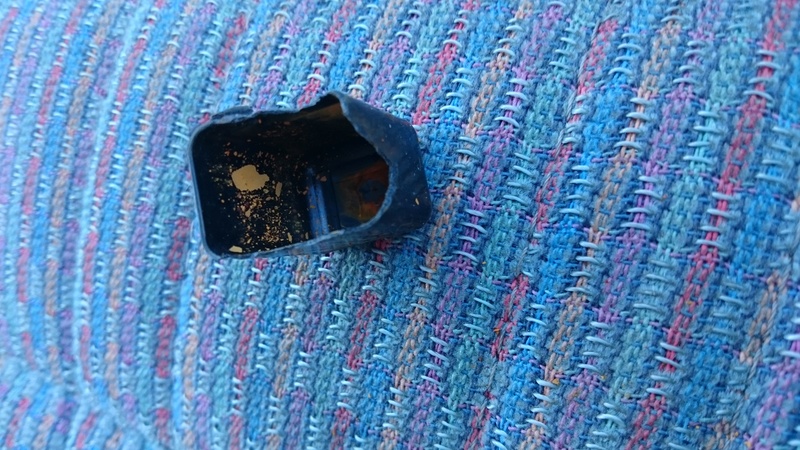
I was curious to see what state my Headlight Relay was in. Bit of a fight to get the black cover off as they are glued in place. What I found took me completely by surprise. The metal parts of the relay were really rusted and there was brown water stains in the lid of the relay. How had water got in there? There was no outward signs of water anywhere under the dash or on any of the other Relays.
The only conclusion that I could come to was that with the 130/90watt H4 bulbs , the Relays were conducting twice the current that they were designed for and getting pretty hot, then when cooling down,, it was causing condensation inside the lid. Quite a lot of it too as you will see from the pictures.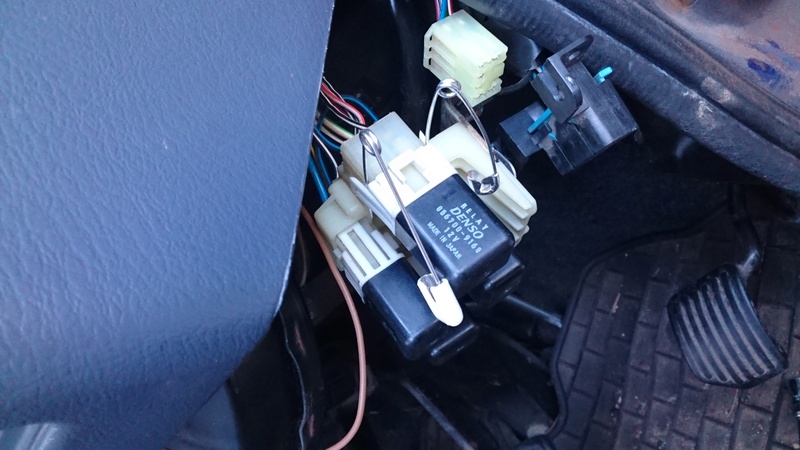


Guest- Guest
 Re: My MPV MOT - - Jobs to do list.
So next job was to sort out the Nearside Headlight. Removed the rear cover of the Headlight and pulled off the H4 connector block and sure enough well corroded.
So out with my two Magic Boxes of Tricks and set about a repair with a Connector Block repair kit. Cut the wire as close to the connector as you can. I would advise doing one wire repair at a time then you shouldn't get in a pickle with which wire goes where?? Strip back the wire with wire strippers if you have them or Stanley knife or whatever method you use and using a red Crimp Bullet connect the wire to the corresponding one on the repair block. Repeat twice more and YES, working Headlight. Great. Another job done.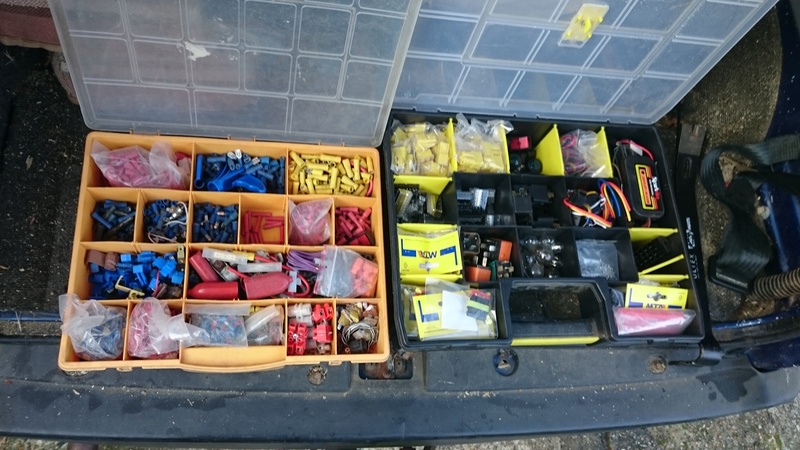
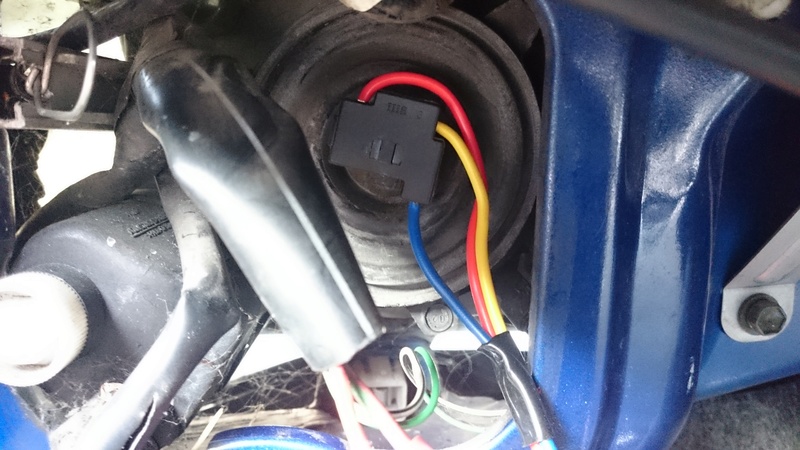
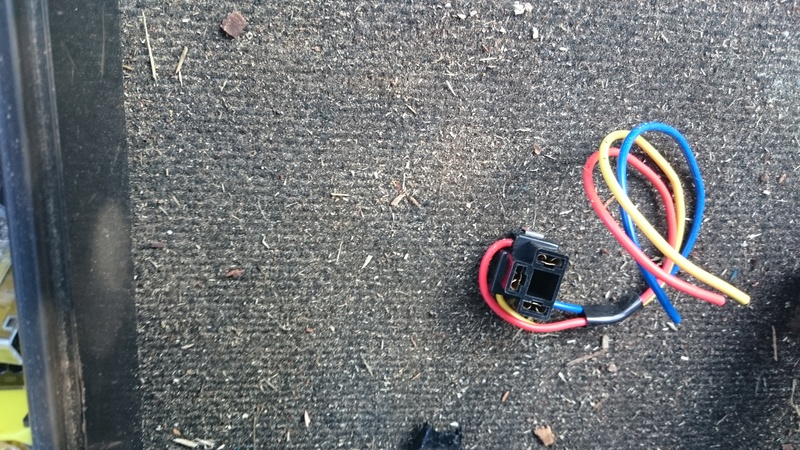
So out with my two Magic Boxes of Tricks and set about a repair with a Connector Block repair kit. Cut the wire as close to the connector as you can. I would advise doing one wire repair at a time then you shouldn't get in a pickle with which wire goes where?? Strip back the wire with wire strippers if you have them or Stanley knife or whatever method you use and using a red Crimp Bullet connect the wire to the corresponding one on the repair block. Repeat twice more and YES, working Headlight. Great. Another job done.


Guest- Guest
 Re: My MPV MOT - - Jobs to do list.
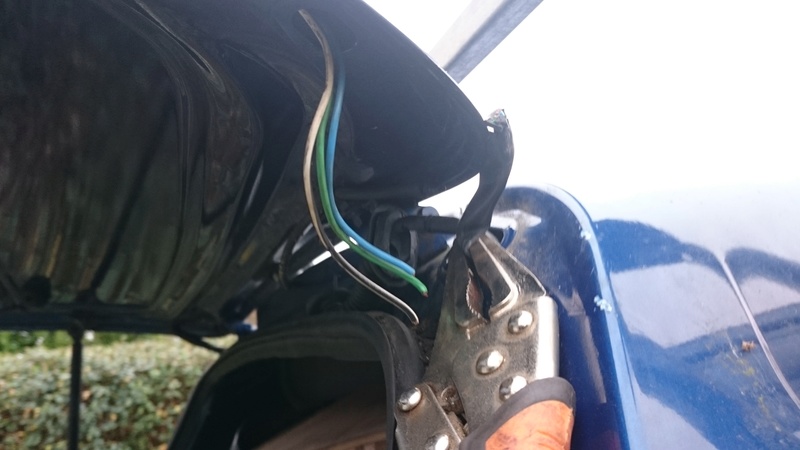
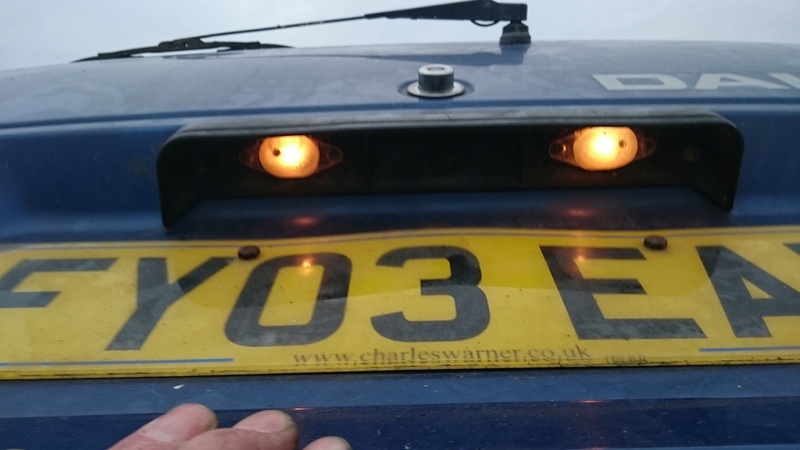
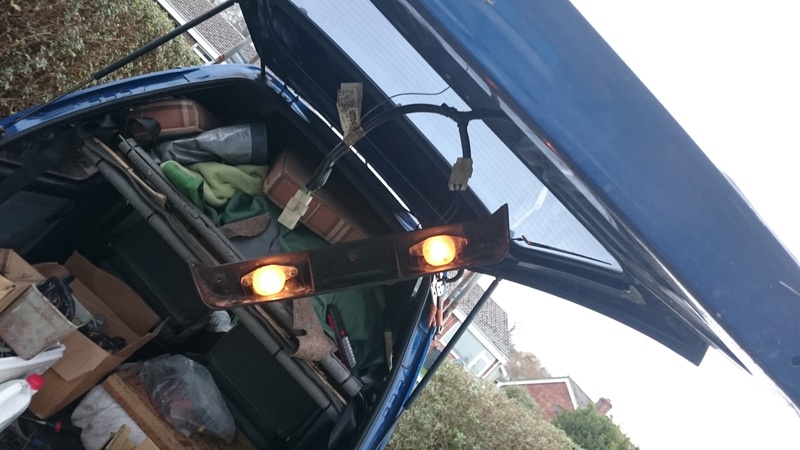
So next job was to sort out the non-working rear number plate lights. First place always to check is the right hand concertina rubber wire protector. Sure enough, the 3 wires were broken. Pull the wire loom up out of the bodywork as far as possible and grip it in place with a pair of Vice Grips. Then you can cut back the loom and strip the end of the wires more easily.
Remove the cover from inside the tailgate and once again gently take up as much slack in the loom as possible and then pull it up out of the Tailgate. Feed the wire through the rubber protector and strip and join the 3 wires with red bullets. Tape the wires up with a small amount of electricians tape. Not too much as the, loom needs to be flexible. Feed the repaired section with the bullets on, down inside the bodywork as you DON'T want those in the rubber concertina.
Make sure you get it fitting flush with the bodywork and the tailgate as you don't want it pulling out and then the wires shorting out on the inside of the hole. Another job ticked off the list.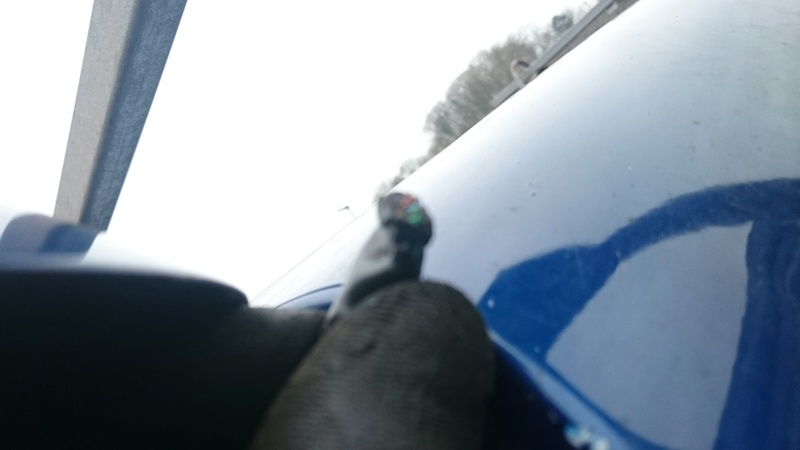


Guest- Guest
 Re: My MPV MOT - - Jobs to do list.
Next and finally - I hope - the rear Wiper. Once again, if yours has packed up check out the concertina rubber. I had already done that last winter so foregone conclusion.
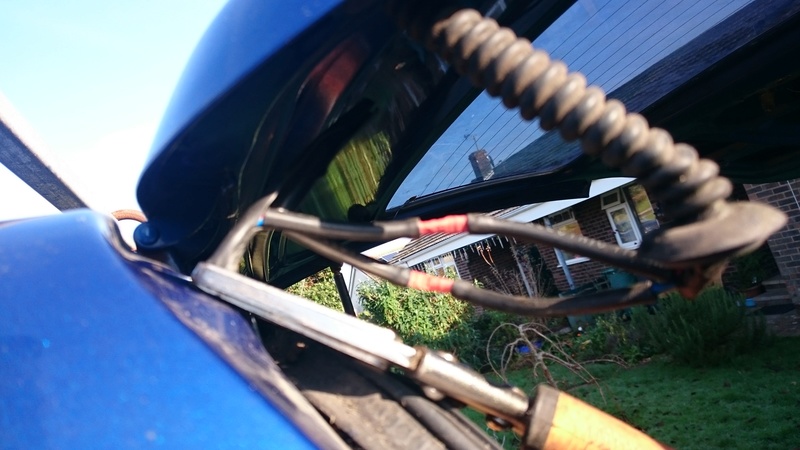
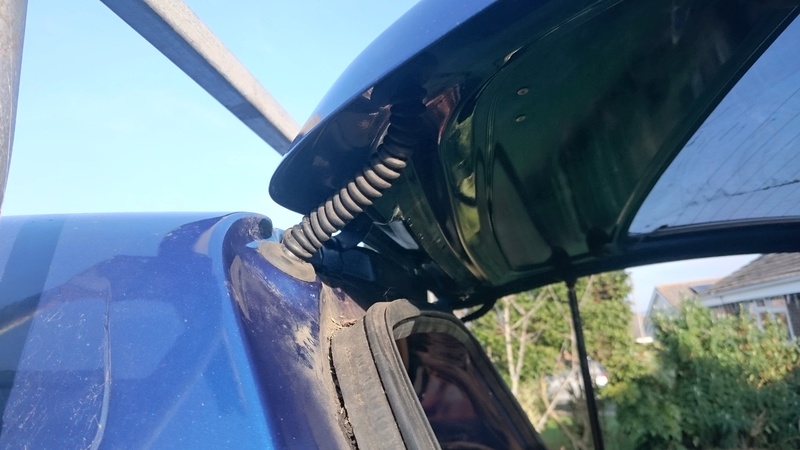
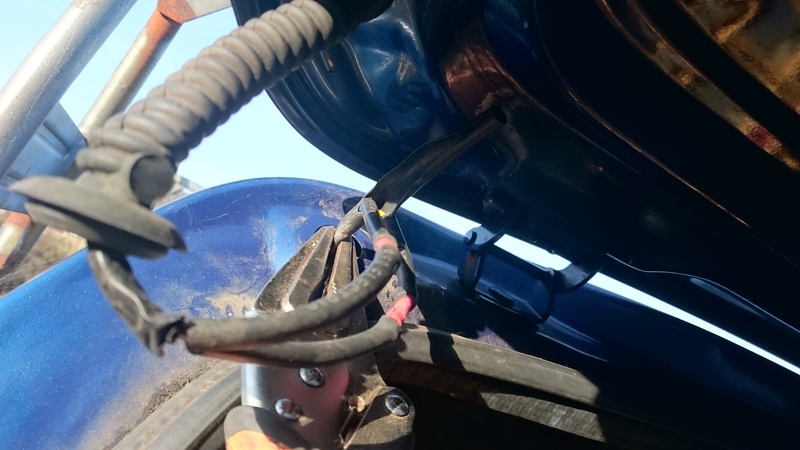
Whilst sorting through spares I have brought back from the Garage I found a coil of the rubber windscreen washer pump pipe that runs from under the passenger seat to the right hand top corner of the tailgate. I used some of it to protect the two wires and over the ends of the red bullet connectors. When joining the wires on either side of the tailgate make sure that you feed the wires through the Conncertina FIRST before fitting the Bullets. Sounds obvious but damp annoying if you forget to do that.
On the number plate Concertina I found that a piece of the loom sheath had got stuck inside and I couldn't get the wire through, so check that out when you have the misfortune to be doing either of these jobs.
Back to the Wiper loom. I pushed a piece of rubber pipe over each of the 4 wire ends (2x2) and then crimped the the bullets and pushed the pipe over the end of the bullet. Tape the two wires/pipes together in a couple of places and then push the connections down into the bodywork, and replace the Concertina making sure it is properly fitted into the body/tailgate.
Job done. Working rear Wiper. Hooray. Mot Friday morning at 7-45am a resounding success. Passed with no Advisories. Bought a year's Road Tax. £230!! I had to Mot Gayle's Toyota Yaris Verso last week and that just needed the handbrake adjusting so Mot until 18th December 2017. Then £145 for Road Tax. I have also had to tax my Mazda 323 1600 Estate for a year - £230. Plus I had to UN-SORN my 1600 Grand Move and tax that for six months £129 (a year is £235-- £5 more than the 1600 Mazda - WHY??) while I was Hi-Jet - less. £734 in total. Ouch!!

Altogether an expensive month and with almost £600 for my Motor Trade Insurance on 17th November all my vehicles are covered for another year.. Thank goodness.
Whilst sorting through spares I have brought back from the Garage I found a coil of the rubber windscreen washer pump pipe that runs from under the passenger seat to the right hand top corner of the tailgate. I used some of it to protect the two wires and over the ends of the red bullet connectors. When joining the wires on either side of the tailgate make sure that you feed the wires through the Conncertina FIRST before fitting the Bullets. Sounds obvious but damp annoying if you forget to do that.
On the number plate Concertina I found that a piece of the loom sheath had got stuck inside and I couldn't get the wire through, so check that out when you have the misfortune to be doing either of these jobs.
Back to the Wiper loom. I pushed a piece of rubber pipe over each of the 4 wire ends (2x2) and then crimped the the bullets and pushed the pipe over the end of the bullet. Tape the two wires/pipes together in a couple of places and then push the connections down into the bodywork, and replace the Concertina making sure it is properly fitted into the body/tailgate.
Job done. Working rear Wiper. Hooray. Mot Friday morning at 7-45am a resounding success. Passed with no Advisories. Bought a year's Road Tax. £230!! I had to Mot Gayle's Toyota Yaris Verso last week and that just needed the handbrake adjusting so Mot until 18th December 2017. Then £145 for Road Tax. I have also had to tax my Mazda 323 1600 Estate for a year - £230. Plus I had to UN-SORN my 1600 Grand Move and tax that for six months £129 (a year is £235-- £5 more than the 1600 Mazda - WHY??) while I was Hi-Jet - less. £734 in total. Ouch!!


Altogether an expensive month and with almost £600 for my Motor Trade Insurance on 17th November all my vehicles are covered for another year.. Thank goodness.
Guest- Guest
 Re: My MPV MOT - - Jobs to do list.
BIG HANDS STRIKES AGAIN!! 
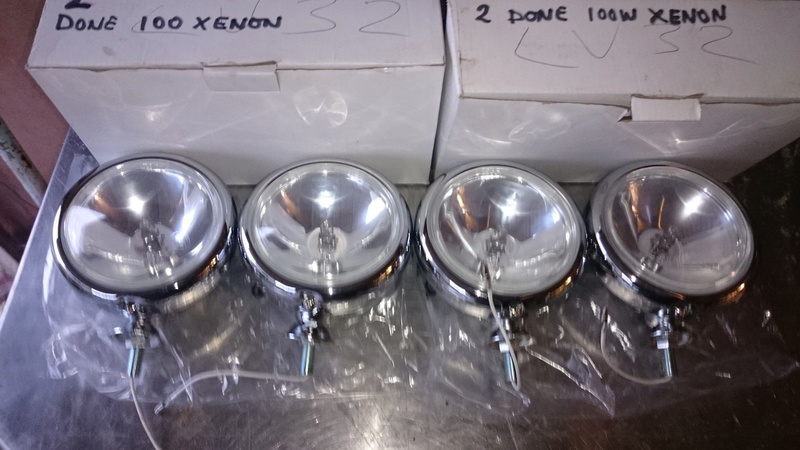
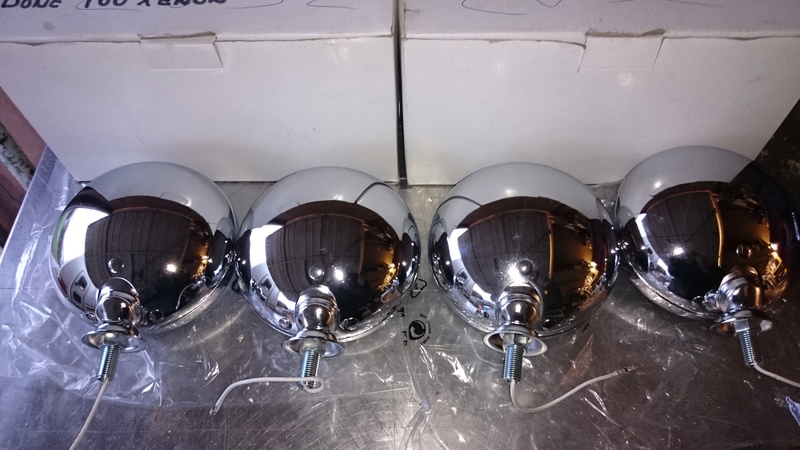

Got these little Demons to fit on the front bumper. They are the same as the ones fitted to the Mini Cooper 1600. Except that I have fitted 100watt Xenon bulbs which are 30% brighter so equivalent to 130 watts. Half a kilowatt of lighting. (400 watts actual) Alternator won't like it but I have got a newish Exide 70amp hour x 540 amp battery to take the abuse for a little while.
Also have a few 100/80 watt H4 bulbs if anyone wants to brighten up their night - times.
Guest- Guest
 Re: My MPV MOT - - Jobs to do list.
Impressive bit of work (why don't we have a thumbs up smiley?)

Logi- Jet Warrior
- Posts : 3662
Join date : 2011-04-07
Age : 89
Location : Kilmarnock
 Re: My MPV MOT - - Jobs to do list.
Thank you Logi for that. Praise indeed from our Wisest Old Sage. See you are back on your PC or tablet, rather than your phone.
I always have problems with my Z3 phone with the size of the keys and the large Beartraps I have been blessed or cursed with.
I always have problems with my Z3 phone with the size of the keys and the large Beartraps I have been blessed or cursed with.
Guest- Guest
 Similar topics
» Ongoing Jobs on the Van
» Use your mobile phone when doing jobs on your Hi-Jet.
» Use your mobile phone when doing jobs on your Hi-Jet.
» Hi-Jet Pick-up Project..
» Definitive list of “how to” threads?
» Use your mobile phone when doing jobs on your Hi-Jet.
» Use your mobile phone when doing jobs on your Hi-Jet.
» Hi-Jet Pick-up Project..
» Definitive list of “how to” threads?
Page 1 of 1
Permissions in this forum:
You cannot reply to topics in this forum
