
The Renovation of Skylark
Page 1 of 5 • 1, 2, 3, 4, 5 ![]()

The Renovation of Skylark
![]() by Raggy Sun Jan 10, 2016 5:51 pm
by Raggy Sun Jan 10, 2016 5:51 pm

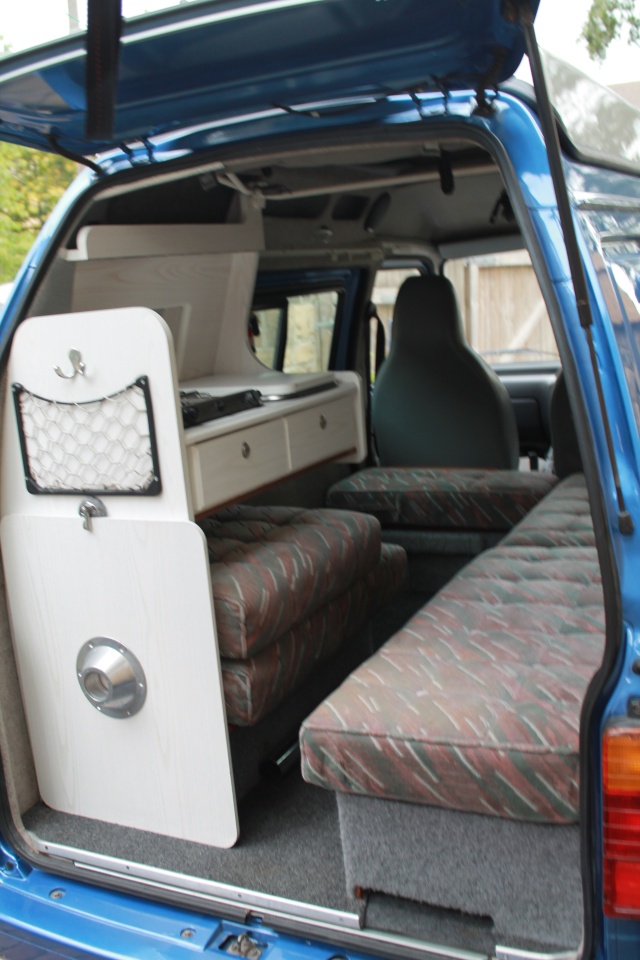
Here's what we started with, not bad in anyone's book I suppose.
First job was a trip to the garage to get her checked out and a thermostat fitted. Turns out as thought she is in fact not in too bad a condition. A lesson in how to bleed the air out from Woody was also in order.

Now I can see what I'm doing at night courtesy of some LED strip lights in the Speedo binnacle, much better.

Radio fix next, it now actually turns off when I take the ignition key out (terrible memory, that's another job to have a warning buzzer for lights!)
Speakers in the front doors to give that surround sound effect...well not really, but I can now hear what's on when driving!


Next was to reinstate the original (or as close as) stickers to the van, not keen of the existing Flash Gordon type flashes down the side!. These are not originals but some I redrew and had printed from photos and dimensions from people on the forum, Thanks!

Now for the bigger job, stripped out all the units and removed all the old, dirty wall carpet/covering. You didn't realise how dirty some of it was until you compared it to some that had been hidden. While it was stripped back I added some sound deadening flashing to the panels and doors and some heat insulation to all I could get to including the pop top roof.

Speaking of the roof, the handle mechanism on mine anyway (don't know if its normal) always hung down right at forehead level when the roof was down and just got in the way, so a bit of thinking provided the solution, move the bottom pivot hole that is in the roof frame forward toward the driver by 1 5/8" approx. and hey presto the handle now sits snuggly up into the rood area away from foreheads!

Van now recovered with Light Grey covering and looking a treat! Was a bit worried at first with the roof and all the curves, wheel arches to do etc but the material does stretch and form well, you have to pull and push it to the shapes but once you start its fine. Took me about three day time sessions to do the van so far. Now just got to remake all the door cards as the originals were screwed to the doors and had got wet so were warped more than Captain Kirk on Star Trek would have liked. That's now a half term job. They will be covered in Anthracite covering just to make it a bit different. The small pockets for storage in the roof gulley have also to be remade but I'm going to veneer these to match the remade kitchen unit which will also be veneered. Trying to sort out what material to use at the moment to keep the weight down. Did read somewhere that every extra 100Kg decreases fuel consumption by about 4% and as its only 993cc any lessening of the load helps.
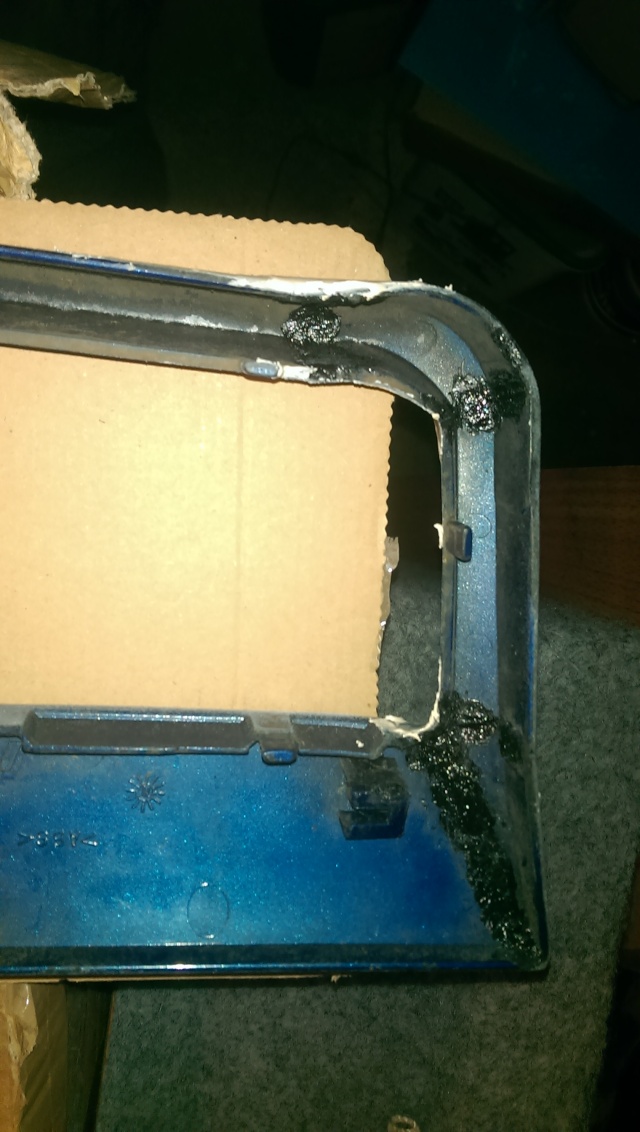
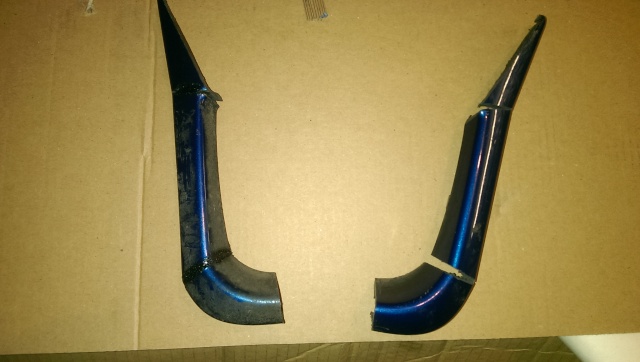
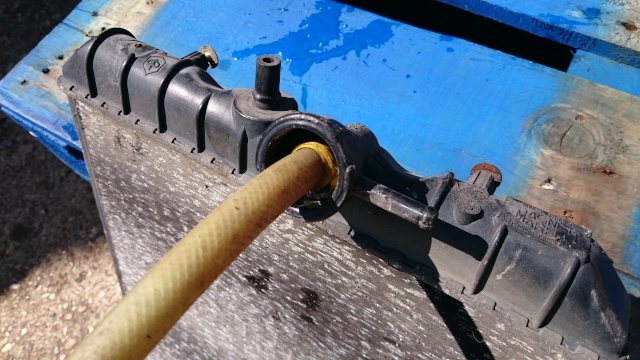
While looking at the overheat issue I saw that the existing Grill cover in front of the radiator actually covers up part of the what is already a small radiator, so got distracted by looking at how to make a new grill. Got a very cheap 1.3 grill from fleabay and broke out the saw. A few cuts later, a bit of plastic welding and I have a grill that fits and does not cover the radiator. Its not finished yet, just a work in progress.
All ready for a coat of paint.
Next is another visit to the garage for a cam belt change, water pump and a check of the head gasket so time will tell. As they say, no one said it would be easy.....or cheap! Did honestly think I would be able to do the mechanical bits myself but never seem to get the time that would be needed as well as sorting out the interior so succumbed to putting my hand in my pocket and letting the garage do it, I'm fortunate that the garage has worked on my friends Hijet before and they are an ex Diahatsu dealership who have experience of them. I'll try and keep this thread updated, may help some people, oh and many thanks to all the forumites who have helped me get this far, you know who you are.
Last edited by Raggy on Sat Jan 16, 2016 1:00 pm; edited 1 time in total

Raggy- Jet Addict
- Posts : 1630
Join date : 2015-05-25
Age : 60
Location : Doncaster
Re: The Renovation of Skylark
![]() by PFM Mon Jan 11, 2016 8:19 pm
by PFM Mon Jan 11, 2016 8:19 pm
PFM- Jet Addict
- Posts : 1901
Join date : 2010-04-24
Age : 63
Location : East Sussex
Re: The Renovation of Skylark
![]() by Raggy Mon Jan 11, 2016 8:45 pm
by Raggy Mon Jan 11, 2016 8:45 pm
At moment trying find someone who will sell lightweight oak veneered furniture board...found some who either will not deliver or want a minimum order of 10 sheets and at around £50 for an 8x4 sheet I dont think so!
Raggy- Jet Addict
- Posts : 1630
Join date : 2015-05-25
Age : 60
Location : Doncaster
Re: The Renovation of Skylark
![]() by Raggy Sat Jan 16, 2016 12:55 pm
by Raggy Sat Jan 16, 2016 12:55 pm
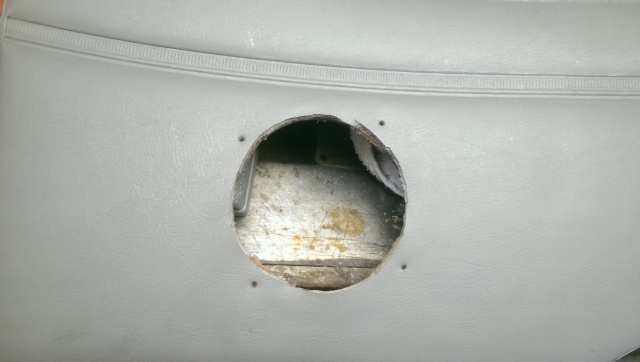
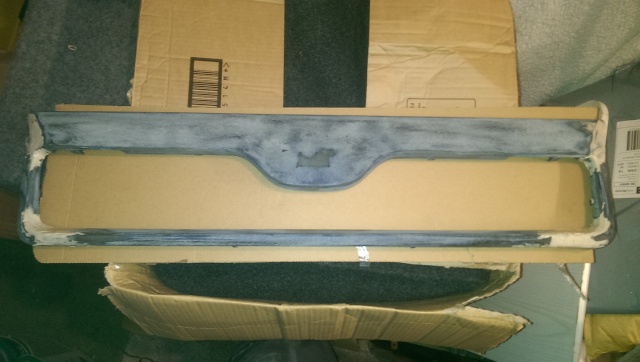
The existing cards, hed been damp, warped and then screwed to the doors.

Todays job is... new door cards. A bit better, now just got to cover them...then another 4 to do!
Raggy- Jet Addict
- Posts : 1630
Join date : 2015-05-25
Age : 60
Location : Doncaster
Re: The Renovation of Skylark
![]() by Raggy Tue Jan 26, 2016 11:19 am
by Raggy Tue Jan 26, 2016 11:19 am
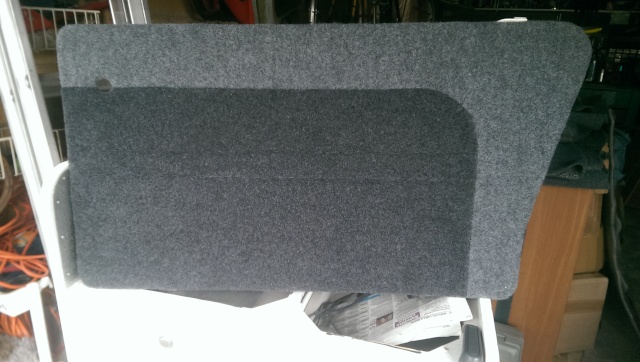
Just got around to covering the panels, quite happy with how they came out. Now to do the other 4 I need to do!
Raggy- Jet Addict
- Posts : 1630
Join date : 2015-05-25
Age : 60
Location : Doncaster
Re: The Renovation of Skylark
![]() by Guest Tue Jan 26, 2016 1:29 pm
by Guest Tue Jan 26, 2016 1:29 pm
Guest- Guest
Re: The Renovation of Skylark
![]() by Raggy Tue Jan 26, 2016 5:17 pm
by Raggy Tue Jan 26, 2016 5:17 pm
Was originally just going to cover them all the same but thought why not do something a little different. Now do I do the front to match?...think I may leave all front as standard....then again?
Raggy- Jet Addict
- Posts : 1630
Join date : 2015-05-25
Age : 60
Location : Doncaster
Re: The Renovation of Skylark
![]() by Guest Tue Jan 26, 2016 5:21 pm
by Guest Tue Jan 26, 2016 5:21 pm
Guest- Guest
Re: The Renovation of Skylark
![]() by Raggy Sat Feb 20, 2016 7:43 pm
by Raggy Sat Feb 20, 2016 7:43 pm
Think I have too much time on my hands at the moment! Just using SketchUp to try and see how I can sort out the seating/bed/cooker arrangement in the camper. Think I got it sorted, fairly similar to standard but just altered the seating a little to include a portapotti, leisure battery and gas bottle. Have raised the seating from what I inherited, more back to standard height now. Now all I have to do is make it!
Raggy- Jet Addict
- Posts : 1630
Join date : 2015-05-25
Age : 60
Location : Doncaster
Re: The Renovation of Skylark
![]() by maralions Mon Feb 22, 2016 9:55 pm
by maralions Mon Feb 22, 2016 9:55 pm
When I got Fran I was all for changing everything, making new boxes etc. and I might still do this. I started to take everything out to put in a wood effect vinyl floor but it turned into a faff with the battery and the water tank which are well and truly stuck in. Add to that 15 years of rusted screws and I gave up
Since then I've convinced myself that it's fine the way it is. I'd love to have it as a double though and I can't help but think that everything is really unnecessarily heavy.
Are you keeping the same table? I want to do a new top for mine as it weighs a ton.
Pictures to follow tomorrow seeing as she's made it home.
maralions- Chatterbox
- Posts : 79
Join date : 2015-11-12
Age : 38
Re: The Renovation of Skylark
![]() by Raggy Mon Feb 22, 2016 10:18 pm
by Raggy Mon Feb 22, 2016 10:18 pm
Yes, the screws around the water tank were rusted on mine but a bit of work with a chisel, screwdriver etc soon sorted them. Unfortunately I now have rather a large pile of bits in the garage that need refurbishing or replacing and putting back!
Raggy- Jet Addict
- Posts : 1630
Join date : 2015-05-25
Age : 60
Location : Doncaster
Re: The Renovation of Skylark
![]() by maralions Tue Feb 23, 2016 3:03 pm
by maralions Tue Feb 23, 2016 3:03 pm
I've just posted some pics of mine in the other thread.
Let me know if you want some help with making new cushions
maralions- Chatterbox
- Posts : 79
Join date : 2015-11-12
Age : 38
Re: The Renovation of Skylark
![]() by Raggy Tue Feb 23, 2016 6:02 pm
by Raggy Tue Feb 23, 2016 6:02 pm
Raggy- Jet Addict
- Posts : 1630
Join date : 2015-05-25
Age : 60
Location : Doncaster
Re: The Renovation of Skylark
![]() by maralions Tue Feb 23, 2016 6:11 pm
by maralions Tue Feb 23, 2016 6:11 pm
I also really wanted to make it into a double sleeper instead of two separate singles but couldn't find a way to make it work - can't lower the driver bit because of the gas bottle and and can't bring the passenger one up because then there'd be no leg room under the cooker.
maralions- Chatterbox
- Posts : 79
Join date : 2015-11-12
Age : 38
Re: The Renovation of Skylark
![]() by Raggy Tue Feb 23, 2016 7:13 pm
by Raggy Tue Feb 23, 2016 7:13 pm
Anyway taking the cooker out is easy, disconnect pipe (water and gas) and two wires to tap, one screw left hand side, couple into water tank surround (these were the difficult ones due to rust), couple of screws in bracket on right under sink side and Bobs your uncle it lifts straight out.
On mine, behind the passenger seat I am intending to make it the high level but when I need it to be a seaping arrangement the top section will lift off to leave a lower section. The two parts to be clipped together for high seat.
May investigate a swivel for the passenger seat to give another seating option but that may be too expensive from what I have seen the swivel plates to be. Some of the Devon conversions had a swivel front seat.
As for another option for full width sleeping would be to totally redesign it to a Devon Bambino conversion which has the cooker unit across the back of the van so no restriction, do like that set up but for me I need the long space down the middle for my bike.
Raggy- Jet Addict
- Posts : 1630
Join date : 2015-05-25
Age : 60
Location : Doncaster
Re: The Renovation of Skylark
![]() by maralions Tue Feb 23, 2016 7:23 pm
by maralions Tue Feb 23, 2016 7:23 pm
I might just leave the kitchen in but put a self supporting sliding shelf or drawer. And I need to paint it. Might just leave it in and take the sink and cooker out for ease of painting. All of this is second to the engine anyway!!
And let's be honest, we can mess around with the arrangement all we want but at the end the day it's tiny and with two people in you both need to be contortionists.
maralions- Chatterbox
- Posts : 79
Join date : 2015-11-12
Age : 38
Raggy- Jet Addict
- Posts : 1630
Join date : 2015-05-25
Age : 60
Location : Doncaster
Re: The Renovation of Skylark
![]() by Raggy Sat Feb 27, 2016 7:53 pm
by Raggy Sat Feb 27, 2016 7:53 pm

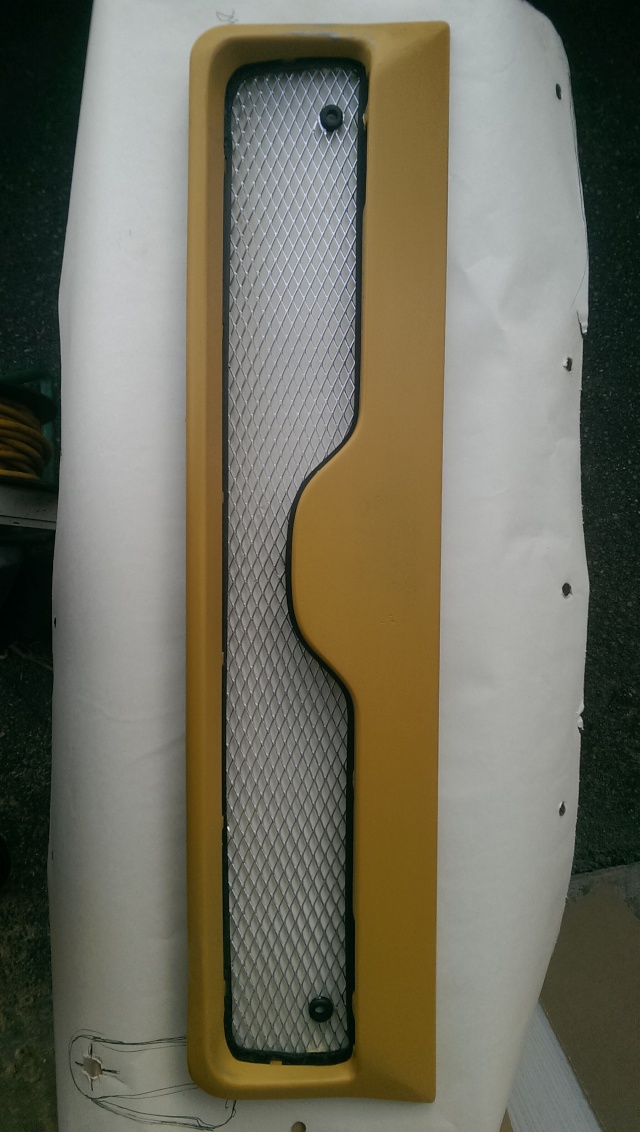
Managed to finish and bolt the 'new' grill onto Skylark, very happy with how its turned out.
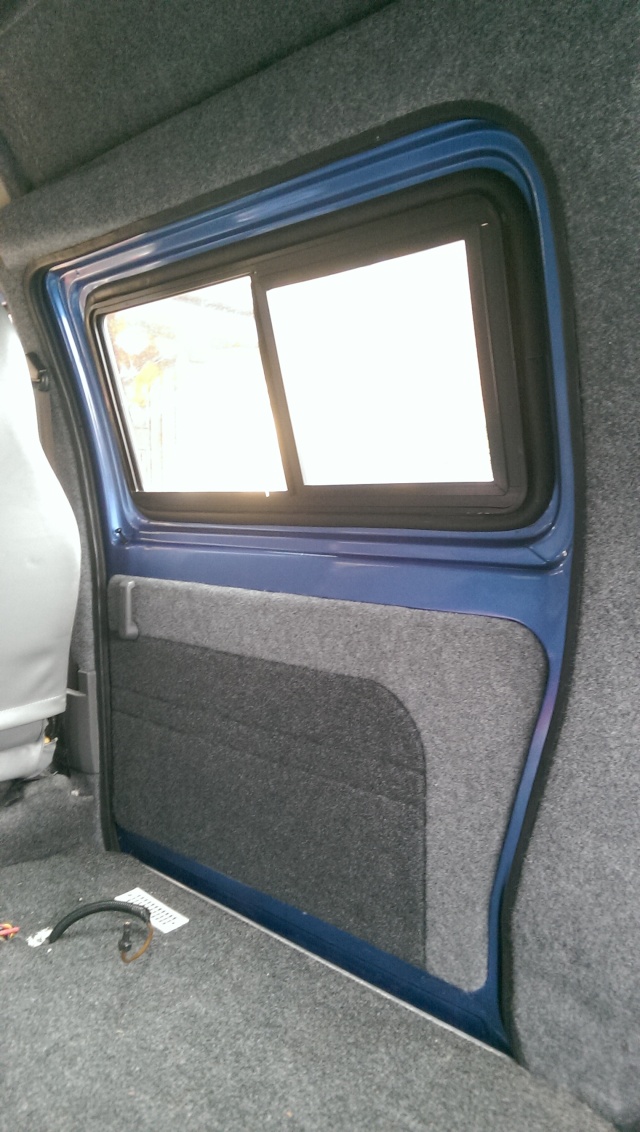
Installed the new door cards, again very happy with these and

Fitted the other panels, rear door and van sides etc.
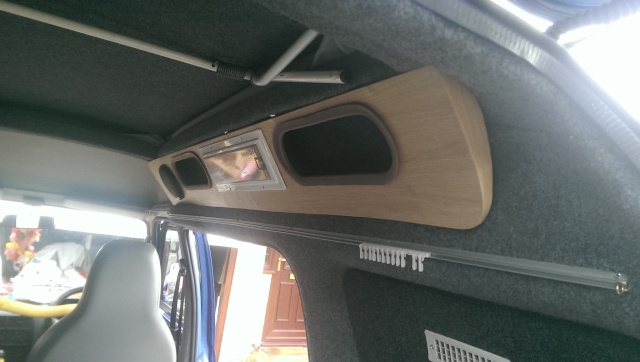
Next job are the roof corner storage pockets.
Last edited by Raggy on Sun Feb 28, 2016 8:18 pm; edited 1 time in total
Raggy- Jet Addict
- Posts : 1630
Join date : 2015-05-25
Age : 60
Location : Doncaster
Re: The Renovation of Skylark
![]() by Raggy Sun Feb 28, 2016 7:58 pm
by Raggy Sun Feb 28, 2016 7:58 pm

Roof storage pockets cut out
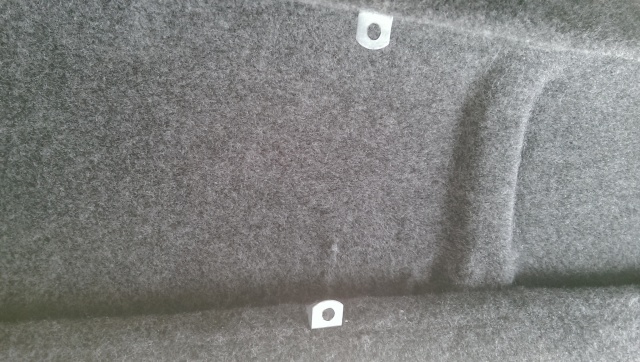
Small brackets to fix storage panels to side and roof rather than just wall carpet as it was before which dried up and the panels were falling off! Going to use door clips to fix panels to brackets and veneer over front of panel so fixings are hidden...I hope!
Raggy- Jet Addict
- Posts : 1630
Join date : 2015-05-25
Age : 60
Location : Doncaster
Re: The Renovation of Skylark
![]() by Guest Mon Feb 29, 2016 12:25 am
by Guest Mon Feb 29, 2016 12:25 am
Guest- Guest

elfin girl- Cinquecento
- Posts : 919
Join date : 2012-09-12
Age : 51
Location : hoddesdon
Re: The Renovation of Skylark
![]() by Raggy Mon Feb 29, 2016 6:39 am
by Raggy Mon Feb 29, 2016 6:39 am
These days honestly wish it could replace the day job!Woodie wrote:Superb work Raggy. Have you realised that you have found a new vocation in addition to supplement the day job?
Raggy- Jet Addict
- Posts : 1630
Join date : 2015-05-25
Age : 60
Location : Doncaster
Re: The Renovation of Skylark
![]() by Logi Mon Feb 29, 2016 3:12 pm
by Logi Mon Feb 29, 2016 3:12 pm

Logi- Jet Warrior
- Posts : 3662
Join date : 2011-04-07
Age : 88
Location : Kilmarnock
Re: The Renovation of Skylark
![]() by Raggy Mon Feb 29, 2016 3:35 pm
by Raggy Mon Feb 29, 2016 3:35 pm
Raggy- Jet Addict
- Posts : 1630
Join date : 2015-05-25
Age : 60
Location : Doncaster
Re: The Renovation of Skylark
![]() by danielfrisbee Mon Mar 07, 2016 11:45 pm
by danielfrisbee Mon Mar 07, 2016 11:45 pm
Lovely job you've done.
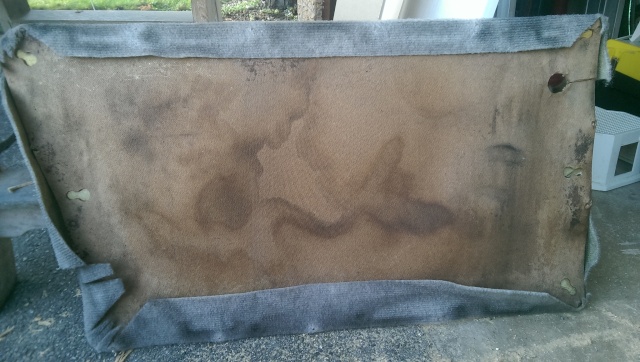
Have you noticed much difference with the damping insulation on the panels? Thinking to do that since it's easier to build from there inwards than do it last.. My foam and material covered ceiling is however filthy from the formerly leaking sunroof, not thrilled about trying to pull all that off and replace, though if I did it would be a good excuse to damp the roof.

danielfrisbee- Chatterbox
- Posts : 82
Join date : 2016-01-12
Location : london
Re: The Renovation of Skylark
![]() by Raggy Tue Mar 08, 2016 7:11 am
by Raggy Tue Mar 08, 2016 7:11 am
Raggy- Jet Addict
- Posts : 1630
Join date : 2015-05-25
Age : 60
Location : Doncaster
Re: The Renovation of Skylark
![]() by Raggy Tue Mar 08, 2016 11:51 am
by Raggy Tue Mar 08, 2016 11:51 am

Next job is the cab head lining but before that I was going to recover the front seats but managed to find some unmarked blue Smart car seats for less that what it would have cost me to recover them how I wanted. So its a trip up to the north east at the weekend as it turns out they are only two streets away from my brother in laws! Spooky!
Raggy- Jet Addict
- Posts : 1630
Join date : 2015-05-25
Age : 60
Location : Doncaster
Re: The Renovation of Skylark
![]() by Guest Tue Mar 08, 2016 10:32 pm
by Guest Tue Mar 08, 2016 10:32 pm
Guest- Guest
Re: The Renovation of Skylark
![]() by HighlyJetted Tue Mar 08, 2016 10:47 pm
by HighlyJetted Tue Mar 08, 2016 10:47 pm
Grill looks good, and the interior work looks like its happening to a very good standard!

HighlyJetted- Hijet Overdose
- Posts : 5595
Join date : 2009-10-06
Age : 41
Location : Cheshire -

Re: The Renovation of Skylark
![]() by Raggy Tue Mar 08, 2016 10:58 pm
by Raggy Tue Mar 08, 2016 10:58 pm
Raggy- Jet Addict
- Posts : 1630
Join date : 2015-05-25
Age : 60
Location : Doncaster
Page 1 of 5 • 1, 2, 3, 4, 5 ![]()
» Up with the Skylark
» Skylark goes to the IOW (again!)
» Skylark Spoiler
» The Adventures of Skylark
|
|
|