
Facelift for Skylark

Facelift for Skylark
![]() by Raggy Sat May 20, 2017 10:10 pm
by Raggy Sat May 20, 2017 10:10 pm
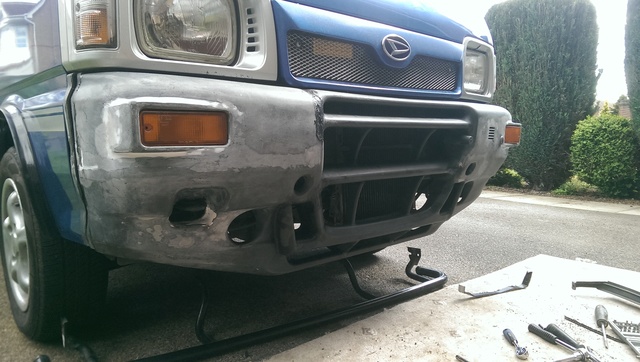
Going 993 to 1.3 bumper conversion will fit but not the other way without some ahem...modification. I also wanted to keep the indicators in the bumper as a nod to the original and add fog/day running halo lights in the 1.3 bumper holes. I also didn't want to spend much! (Just in case it all went belly up!).
Managed to find a spare 993 bumper and two smashed 1.3 bumpers to use as donors for parts.

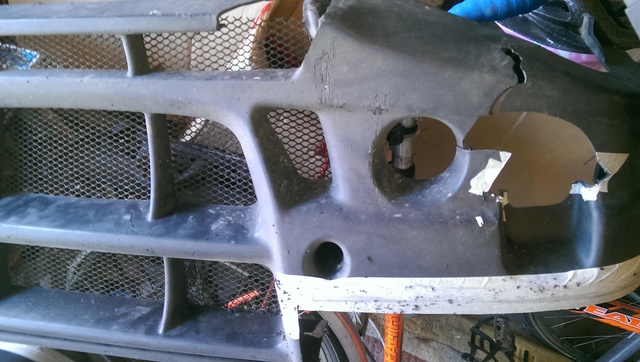

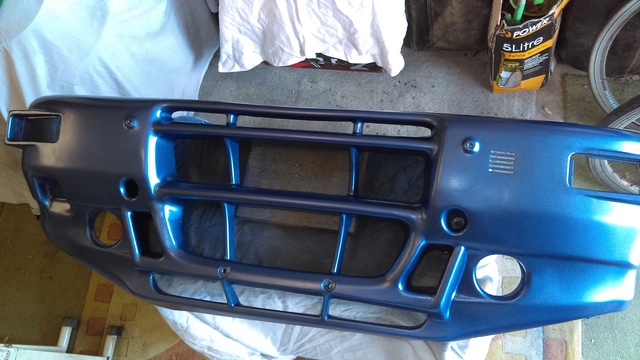
First step was to make a complete 1.3 out of the two broken ones, then create the pods for the indicators as the 1.3 bumper curves more than the 993.

Once this had been done a trial fit was required to see where the issues over fit would be. Turned out main points were the ends of the bumper bar and the fact that the 993 is more of a flatter profile and the 1.3 is curved under the front and at the sides. So to get it to fit anywhere near the original bolt locations the front of the 1.3 had to be flattened by about 40mm by moving the bottom grill bar forward that amount then building a supporting structure for it by using offcuts and sections from the bits of bumpers I had left over.
All sections were plastic welded together by use of a small butane torch and a soldering iron.
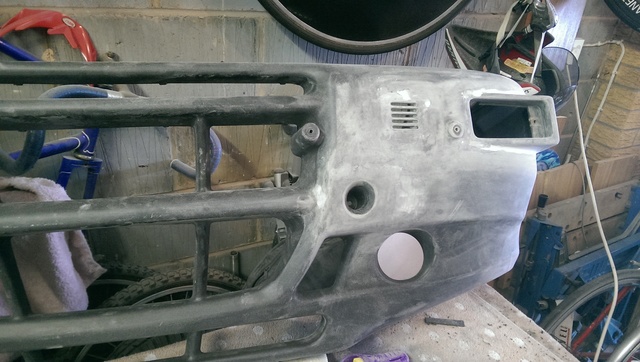
Now the front had been modified another trial fit was required to heck fit. Turned out I needed some trimming from the sides and top edge to get it to fit snugly.


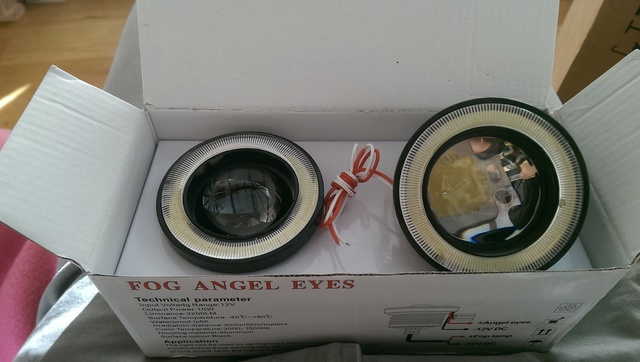
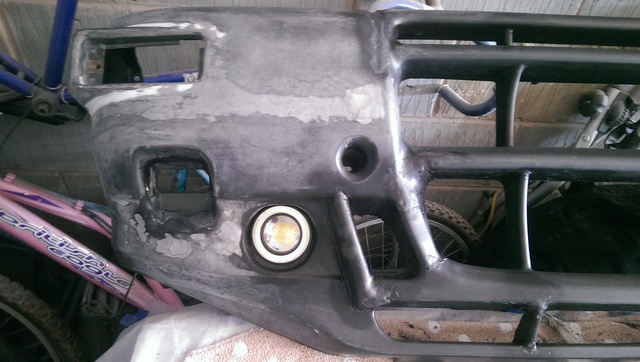
OK, good so far, so now the fog/daytime lights. The final fog light holes old have been used but didn't give the fit I wanted (picky ain't I) so trimmed them down a touch, made them more circular as they seemed to be more oval. Need to attach some mounting posts where I want them and make some brackets yet though.


I will update this as I go along, been doing it on and off for a couple of months now, an hour here and there. Wasn't allowed to immerse myself in it till we had finished the new kitchen!
Now some may ask why spend all this time doing it?....simple answer is....just because I can and I enjoy doing it

Raggy- Jet Addict
- Posts : 1630
Join date : 2015-05-25
Age : 61
Location : Doncaster
Re: Facelift for Skylark
![]() by Raggy Mon Jul 10, 2017 12:44 pm
by Raggy Mon Jul 10, 2017 12:44 pm

Raggy- Jet Addict
- Posts : 1630
Join date : 2015-05-25
Age : 61
Location : Doncaster
Re: Facelift for Skylark
![]() by Raggy Wed Jul 19, 2017 8:36 pm
by Raggy Wed Jul 19, 2017 8:36 pm

Raggy- Jet Addict
- Posts : 1630
Join date : 2015-05-25
Age : 61
Location : Doncaster
Re: Facelift for Skylark
![]() by elfin girl Sat Jul 22, 2017 9:46 am
by elfin girl Sat Jul 22, 2017 9:46 am

elfin girl- Cinquecento
- Posts : 919
Join date : 2012-09-12
Age : 52
Location : hoddesdon
Re: Facelift for Skylark
![]() by Raggy Sun Jul 23, 2017 8:00 pm
by Raggy Sun Jul 23, 2017 8:00 pm
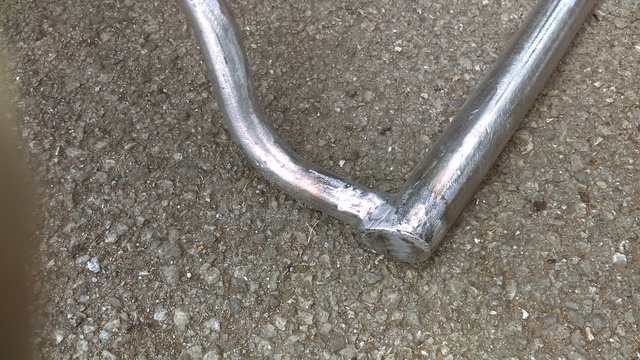


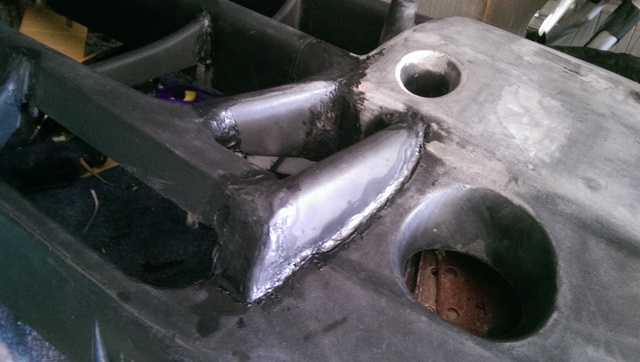
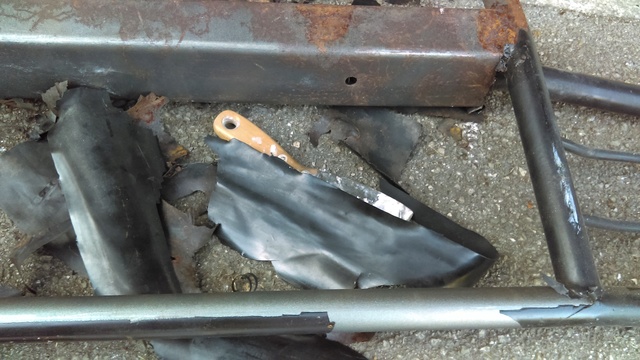
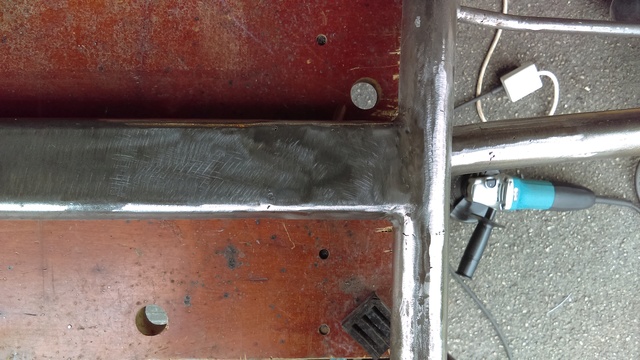
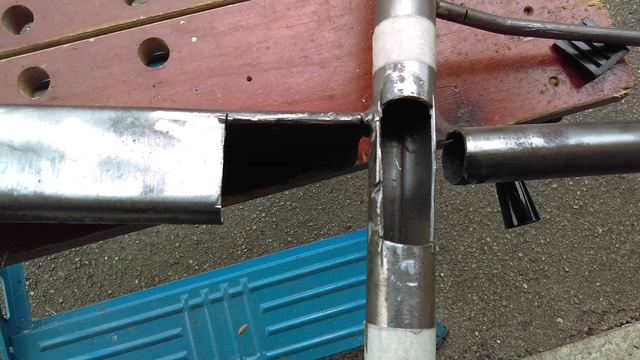
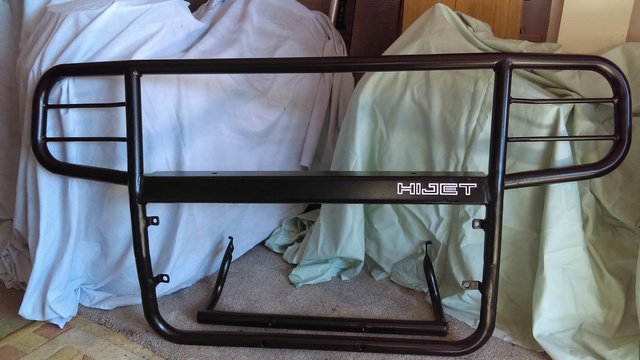
Slow progress this weekend, sorting out the front bumper bar from the 993 to fit the new 1.3 bumper. It's a matter of try it, cut it, weld it, try it, re weld it, cut it etc. Ended up with this shortened one both in length and width that fits snugly behind the new bumper and allows me to bolt the bull bars to it rather than use the normal clamp plates, much neater. To allow the tubes to fit together with the bumper and not squash it out of shape, I found some sailing plastic/rubber mast washers and bonded them to either side of the new bumper. M8 butting head bolts should secure it OK. Got to weld some threaded inserts into the small bumper tube now to accept the bolts. Slowly getting there.
Raggy- Jet Addict
- Posts : 1630
Join date : 2015-05-25
Age : 61
Location : Doncaster
Re: Facelift for Skylark
![]() by Raggy Sun Jul 30, 2017 9:43 pm
by Raggy Sun Jul 30, 2017 9:43 pm
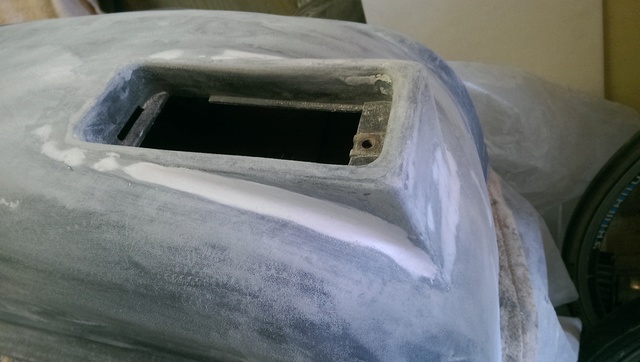
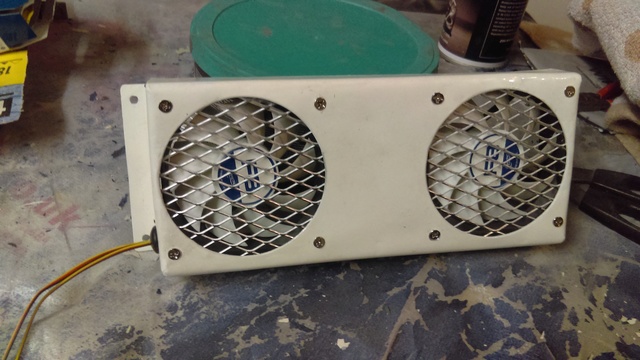
Had enough time to create this small extractor fan setup for the seat unit that houses the coolbox/porta loo. The cool box generates heat so rather than have it overheat got a vent in the front of the seat and these fans to generate air flow.


Raggy- Jet Addict
- Posts : 1630
Join date : 2015-05-25
Age : 61
Location : Doncaster
Re: Facelift for Skylark
![]() by Guest Mon Jul 31, 2017 4:58 am
by Guest Mon Jul 31, 2017 4:58 am

Guest- Guest
Re: Facelift for Skylark
![]() by Raggy Mon Jul 31, 2017 9:07 am
by Raggy Mon Jul 31, 2017 9:07 am
Raggy- Jet Addict
- Posts : 1630
Join date : 2015-05-25
Age : 61
Location : Doncaster
Re: Facelift for Skylark
![]() by Raggy Fri Aug 04, 2017 8:44 pm
by Raggy Fri Aug 04, 2017 8:44 pm
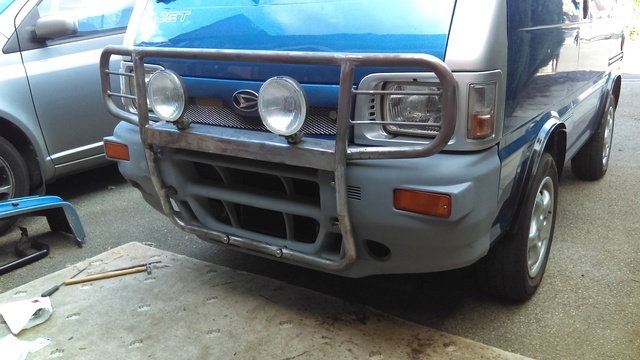


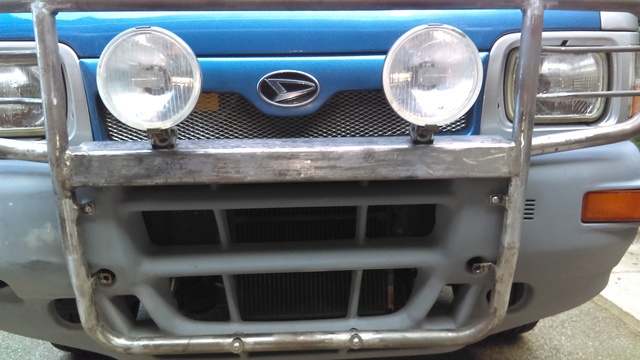
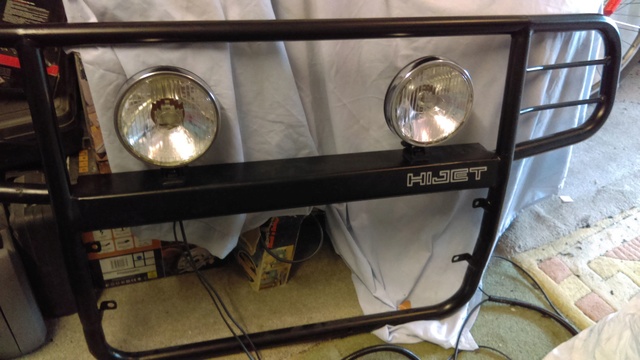
Well its getting closer to completion, trial fit of it all together. Need to get bull bar powder coated and finish sanding and painting the bumper, then wire it all up.
Raggy- Jet Addict
- Posts : 1630
Join date : 2015-05-25
Age : 61
Location : Doncaster

Raggy- Jet Addict
- Posts : 1630
Join date : 2015-05-25
Age : 61
Location : Doncaster
Re: Facelift for Skylark
![]() by andy pyke Sat Aug 05, 2017 8:15 pm
by andy pyke Sat Aug 05, 2017 8:15 pm
It becomes an obsession doesn't it?
andy pyke- Centurion
- Posts : 274
Join date : 2014-11-09
Age : 56
Location : Maidstone
Re: Facelift for Skylark
![]() by Guest Sat Aug 05, 2017 8:38 pm
by Guest Sat Aug 05, 2017 8:38 pm
Guest- Guest
Re: Facelift for Skylark
![]() by Raggy Sat Aug 05, 2017 9:03 pm
by Raggy Sat Aug 05, 2017 9:03 pm
Dropped the bull bars off at the powder coaters this morning for a nice matt black which should be ready to pick up next week. Just in the process of sanding down the bumper and sorting few bits out I had left until I knew it all fitted together. Getting good at taking the bumper on and off now! Fitted the extractor fan unit in the seat base where the cool box goes so just need a double to single cig power adaptor from my friend flea bay.
Raggy- Jet Addict
- Posts : 1630
Join date : 2015-05-25
Age : 61
Location : Doncaster
Re: Facelift for Skylark
![]() by Raggy Sat Aug 05, 2017 9:10 pm
by Raggy Sat Aug 05, 2017 9:10 pm
Raggy- Jet Addict
- Posts : 1630
Join date : 2015-05-25
Age : 61
Location : Doncaster
Re: Facelift for Skylark
![]() by Guest Sat Aug 05, 2017 9:23 pm
by Guest Sat Aug 05, 2017 9:23 pm
Guest- Guest
Re: Facelift for Skylark
![]() by Raggy Sat Aug 05, 2017 9:26 pm
by Raggy Sat Aug 05, 2017 9:26 pm
Raggy- Jet Addict
- Posts : 1630
Join date : 2015-05-25
Age : 61
Location : Doncaster
Re: Facelift for Skylark
![]() by Guest Sun Aug 06, 2017 8:36 am
by Guest Sun Aug 06, 2017 8:36 am
at first i thought it wasnt going to look good, but i was wrong.
looks nice
Guest- Guest
Re: Facelift for Skylark
![]() by CoolJet Tue Aug 08, 2017 11:15 am
by CoolJet Tue Aug 08, 2017 11:15 am
Pretty pretty pretty nice bumper!

CoolJet- Centurion
- Posts : 168
Join date : 2015-07-06
Age : 44
Location : Rhein-Ruhr Komplex
Re: Facelift for Skylark
![]() by Raggy Sun Aug 13, 2017 2:18 pm
by Raggy Sun Aug 13, 2017 2:18 pm

Raggy- Jet Addict
- Posts : 1630
Join date : 2015-05-25
Age : 61
Location : Doncaster

Logi- Jet Warrior
- Posts : 3662
Join date : 2011-04-07
Age : 89
Location : Kilmarnock
Re: Facelift for Skylark
![]() by Raggy Sun Aug 20, 2017 7:27 pm
by Raggy Sun Aug 20, 2017 7:27 pm

Sheet of 9mm MDF with all the holes cut out, formers are the middle just a bit smaller

Shows how the former sits to allow the mesh to form around it. Next time (as if!) be better with a smaller gap.
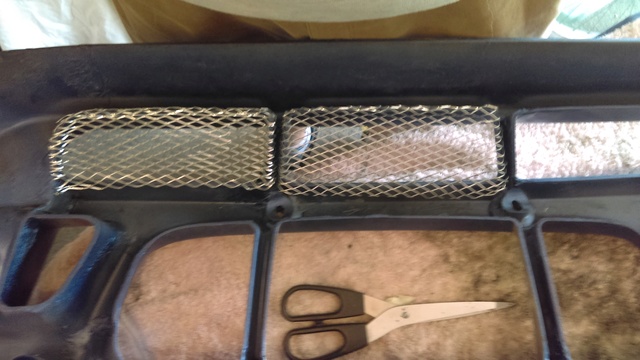
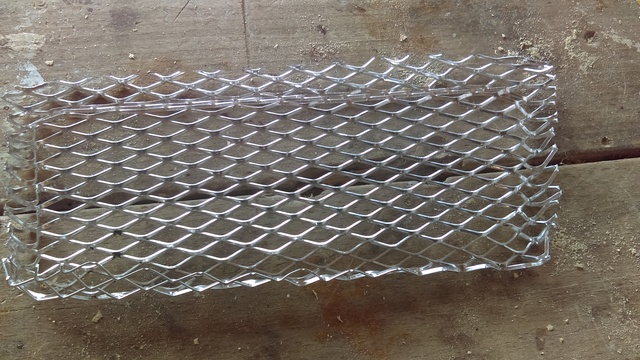
Mesh formed and trimmed to size

And how it all looks when they have all been done and fixed in place. Happy with it. Next step is to fit it all on Skylark and try and wire the fog, daytime running an driving lights.
Raggy- Jet Addict
- Posts : 1630
Join date : 2015-05-25
Age : 61
Location : Doncaster
Re: Facelift for Skylark
![]() by Guest Sun Aug 20, 2017 8:15 pm
by Guest Sun Aug 20, 2017 8:15 pm
Guest- Guest
Raggy- Jet Addict
- Posts : 1630
Join date : 2015-05-25
Age : 61
Location : Doncaster
Re: Facelift for Skylark
![]() by Raggy Sun Aug 27, 2017 5:08 pm
by Raggy Sun Aug 27, 2017 5:08 pm


Raggy- Jet Addict
- Posts : 1630
Join date : 2015-05-25
Age : 61
Location : Doncaster
Re: Facelift for Skylark
![]() by Logi Sun Aug 27, 2017 5:10 pm
by Logi Sun Aug 27, 2017 5:10 pm
Logi- Jet Warrior
- Posts : 3662
Join date : 2011-04-07
Age : 89
Location : Kilmarnock
Re: Facelift for Skylark
![]() by Raggy Sun Aug 27, 2017 7:43 pm
by Raggy Sun Aug 27, 2017 7:43 pm
Raggy- Jet Addict
- Posts : 1630
Join date : 2015-05-25
Age : 61
Location : Doncaster
Re: Facelift for Skylark
![]() by Raggy Mon Aug 28, 2017 12:51 pm
by Raggy Mon Aug 28, 2017 12:51 pm


Raggy- Jet Addict
- Posts : 1630
Join date : 2015-05-25
Age : 61
Location : Doncaster
Re: Facelift for Skylark
![]() by George Sportif Fri Oct 06, 2017 6:55 pm
by George Sportif Fri Oct 06, 2017 6:55 pm
George Sportif- Clubman
- Posts : 32
Join date : 2017-09-21
» Skylark goes to the IOW (again!)
» Skylark and the cat...
» Up with the Skylark
» Skylark Spoiler