
Pick-Up Rear Light Problems With Rusty Bulb Holders?? My Solution.
Page 1 of 1

Pick-Up Rear Light Problems With Rusty Bulb Holders?? My Solution.
![]() by Guest Wed Dec 14, 2016 2:53 pm
by Guest Wed Dec 14, 2016 2:53 pm
I bought my first Hi-Jet - a Pick-Up - in 2004. After several Mot's worth of despair at the state of the Rear Light Bulb Holders and not at that time broken any Pick-Ups I turned to the Van Rear Lights to see if I could use the plastic bulb holders that they used.
After removal of the back lights from my Red Pick up I thought that it would be reasonably easy to modify both the Light Unit and the Van Bulb Holders to fit together and solve a very common problem of rusty Bulb Holders.
First, using a small Electrician's Screwdriver lever up the little tabs and remove the rusty Holder. You will see that the holder is slightly recessed into the unit, so you have a handy register to work to as you will see in a bit. Using the Van Holders there is two ways to tackle the fitting of them. You can glue them in place or use the Bayonet tabs on the Holder to hold them in place. I will cover the easiest way first to glue them in or interference fit into the Light Body.
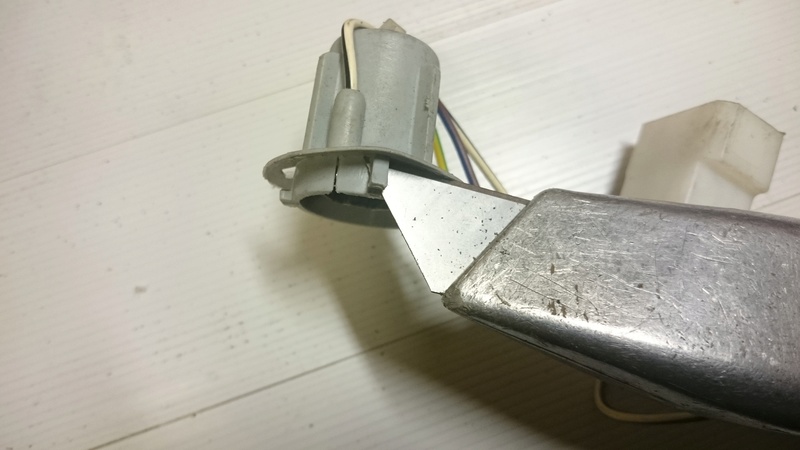
First, I will fit the Indicator Bulb Holder. Remove the little moulded lug next to the split on the Holder very carefully with a Stanley Knife. Next remove the two Bayonet Lugs and file any excess plastic down from the 3 cuts you have done,. The Holder needs to be perfectly round. You will need it to be a nice tight fit in the body of the unit that you are going to be filing down. Using a Half Round File enlarge the Indicator by filing away the plastic edge of the recessed plastic ALMOST to the shoulder of the hole checking all the time for a nice fit. I use Wurth Polyurethane Sealant/Adhesive to seal and fix it. I find this is the best method of fitting the Indicator Holder as the plastic moulding platform is thicker than the Stoplight one and unless you cut the plastic away around the hole it is too thick to use the Bayonet Lug mounting method. One problem with using the Van Bulb Holders is that they are not watertight. I once again use the Wurth to seal the hole in the back of the holder where the single wire goes in. You need to have the bulb in place when you seal the hole up.
Next, on to the Lights/Brake Light Holder. This one I will show you the alternative method of fitting. Remove the rusty holder as previously described. Once again you will need to file the hole back ALMOST to the shoulder. On the Bulb Holder there is a split which is part of the moulding. Next to it is the lug that needs removing with the Stanley knife. Don't cut off the two Bayonet Tabs. The Tabs are two sizes. Use the width of the larger one as your measurement to mark the edge of the hole with a Stanley Knife.
I bought a set of miniature files for £3.00 and these are fine to file a slot on the side of the hole for the larger Tab to fit through. Only file ONE Slot.. Don't file a corresponding slot opposite, for the smaller Tab. You can hook the small tab onto the inside edge of the hole first, then locate the larger tab through the filed Slot then twist the holder 90° and it is snugly fitted in place. Once again use the Wurth so seal it in place and to seal up the pair of wires in the back of the bulb holder. Once again the bulb needs to be in place before you seal up the hole. If you change the bulbs in the future you will almost certainly have to reseal the wire(s) . Check that out before you put the Light unit back in place.
Right, I have loads of photos to Download and will try and post them in the sequence of the instructions I have given - - but don't hold your breath.

Hopefully this will have sent 4 pictures but as 10 mb is the limit I won't hold my breath.
After removal of the back lights from my Red Pick up I thought that it would be reasonably easy to modify both the Light Unit and the Van Bulb Holders to fit together and solve a very common problem of rusty Bulb Holders.
First, using a small Electrician's Screwdriver lever up the little tabs and remove the rusty Holder. You will see that the holder is slightly recessed into the unit, so you have a handy register to work to as you will see in a bit. Using the Van Holders there is two ways to tackle the fitting of them. You can glue them in place or use the Bayonet tabs on the Holder to hold them in place. I will cover the easiest way first to glue them in or interference fit into the Light Body.
First, I will fit the Indicator Bulb Holder. Remove the little moulded lug next to the split on the Holder very carefully with a Stanley Knife. Next remove the two Bayonet Lugs and file any excess plastic down from the 3 cuts you have done,. The Holder needs to be perfectly round. You will need it to be a nice tight fit in the body of the unit that you are going to be filing down. Using a Half Round File enlarge the Indicator by filing away the plastic edge of the recessed plastic ALMOST to the shoulder of the hole checking all the time for a nice fit. I use Wurth Polyurethane Sealant/Adhesive to seal and fix it. I find this is the best method of fitting the Indicator Holder as the plastic moulding platform is thicker than the Stoplight one and unless you cut the plastic away around the hole it is too thick to use the Bayonet Lug mounting method. One problem with using the Van Bulb Holders is that they are not watertight. I once again use the Wurth to seal the hole in the back of the holder where the single wire goes in. You need to have the bulb in place when you seal the hole up.
Next, on to the Lights/Brake Light Holder. This one I will show you the alternative method of fitting. Remove the rusty holder as previously described. Once again you will need to file the hole back ALMOST to the shoulder. On the Bulb Holder there is a split which is part of the moulding. Next to it is the lug that needs removing with the Stanley knife. Don't cut off the two Bayonet Tabs. The Tabs are two sizes. Use the width of the larger one as your measurement to mark the edge of the hole with a Stanley Knife.
I bought a set of miniature files for £3.00 and these are fine to file a slot on the side of the hole for the larger Tab to fit through. Only file ONE Slot.. Don't file a corresponding slot opposite, for the smaller Tab. You can hook the small tab onto the inside edge of the hole first, then locate the larger tab through the filed Slot then twist the holder 90° and it is snugly fitted in place. Once again use the Wurth so seal it in place and to seal up the pair of wires in the back of the bulb holder. Once again the bulb needs to be in place before you seal up the hole. If you change the bulbs in the future you will almost certainly have to reseal the wire(s) . Check that out before you put the Light unit back in place.
Right, I have loads of photos to Download and will try and post them in the sequence of the instructions I have given - - but don't hold your breath.
Hopefully this will have sent 4 pictures but as 10 mb is the limit I won't hold my breath.
Guest- Guest
Re: Pick-Up Rear Light Problems With Rusty Bulb Holders?? My Solution.
![]() by Guest Wed Dec 14, 2016 3:15 pm
by Guest Wed Dec 14, 2016 3:15 pm
Wonders never cease!!!
After cutting the Tabs and the moulding off the Indicator Bulb holder make sure that the hole you are filing isn't over done,. You do ideally want a snug fit for the holder.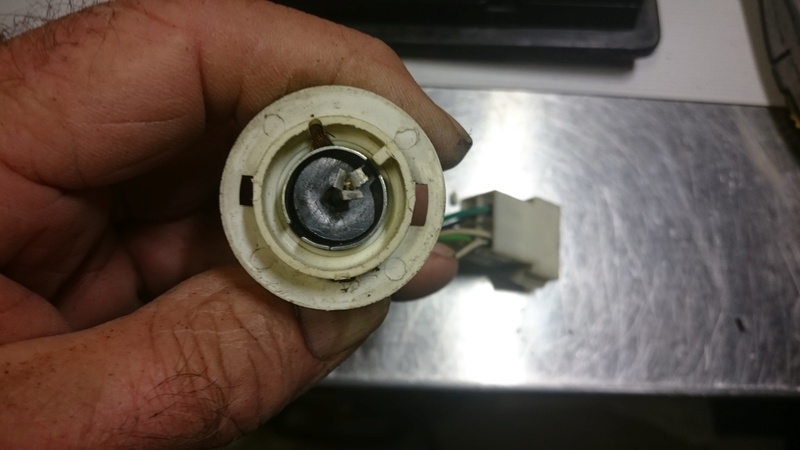

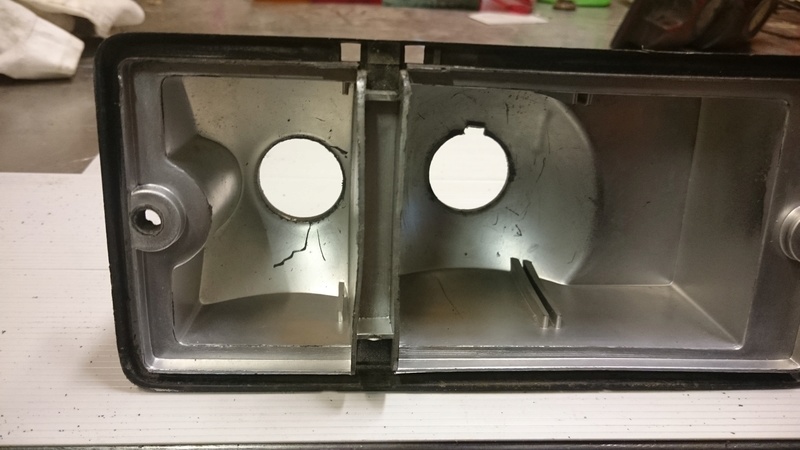
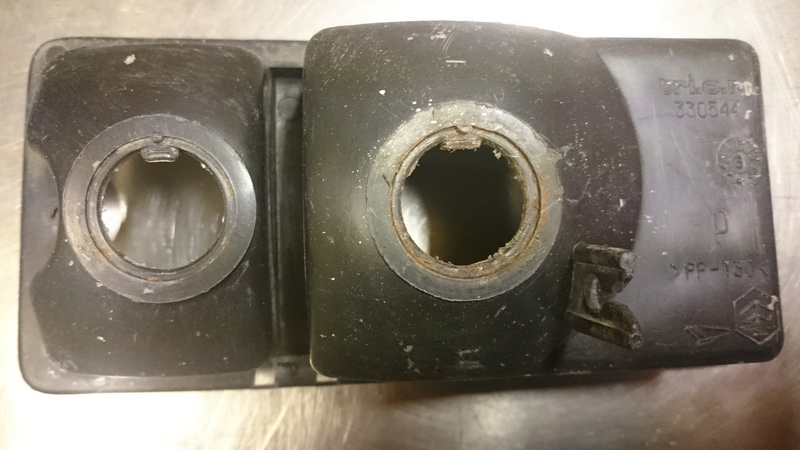
In the fourth picture you can see the slot filed out for the Locating Tab on the Brake/Sidelight Bulb Holder.
After cutting the Tabs and the moulding off the Indicator Bulb holder make sure that the hole you are filing isn't over done,. You do ideally want a snug fit for the holder.
In the fourth picture you can see the slot filed out for the Locating Tab on the Brake/Sidelight Bulb Holder.
Guest- Guest
Re: Pick-Up Rear Light Problems With Rusty Bulb Holders?? My Solution.
![]() by Guest Wed Dec 14, 2016 3:29 pm
by Guest Wed Dec 14, 2016 3:29 pm
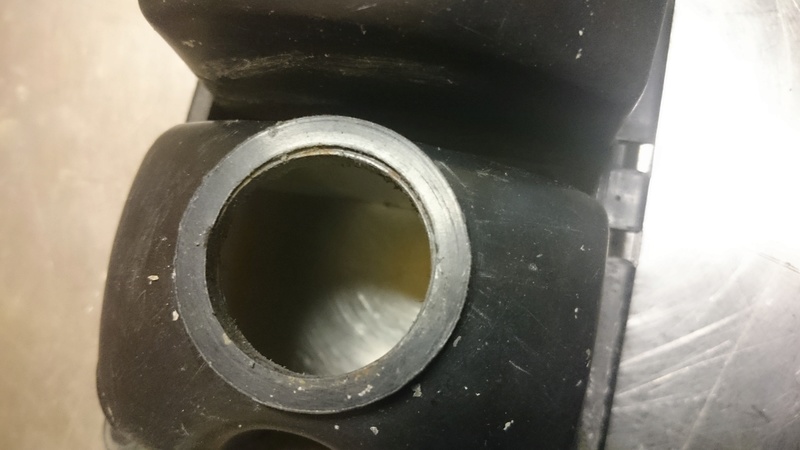
Fitting the Brake Lights Holder by hooking the small tab into the hole first then locate the tab through the slot and twist the Holder 90° to lock it in place.
When you are happy with the fit of the holders you can glue them into place and seal up the wires on the back.


When you are happy with the fit of the holders you can glue them into place and seal up the wires on the back.
Guest- Guest
Re: Pick-Up Rear Light Problems With Rusty Bulb Holders?? My Solution.
![]() by Guest Wed Dec 14, 2016 3:45 pm
by Guest Wed Dec 14, 2016 3:45 pm
Before you glue the holders in, if yours are in the above sad condition, then good idea to apply some bright shiny silver paint now. 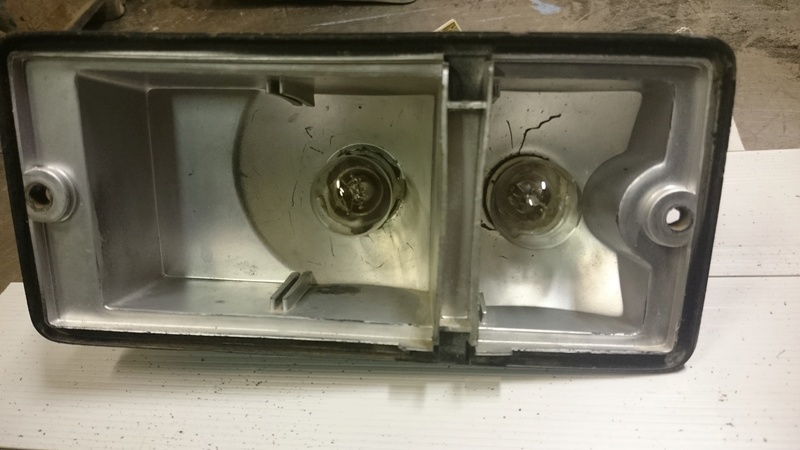

My Original first try years ago for my Red Pickup on the left and Today's attempt.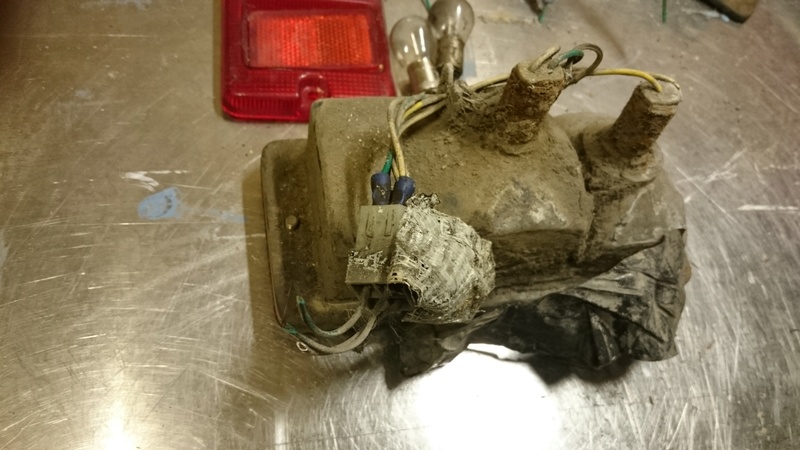
My Original first try years ago for my Red Pickup on the left and Today's attempt.
Guest- Guest
Re: Pick-Up Rear Light Problems With Rusty Bulb Holders?? My Solution.
![]() by Guest Wed Dec 14, 2016 3:52 pm
by Guest Wed Dec 14, 2016 3:52 pm
Just remembered that I have got to sort out the wire colour codes in the Multi Plug as I am sure that they are different apart from the Earth wires. Will try and sort that out in the next few days.
Guest- Guest
Re: Pick-Up Rear Light Problems With Rusty Bulb Holders?? My Solution.
![]() by HighlyJetted Thu Dec 15, 2016 11:30 pm
by HighlyJetted Thu Dec 15, 2016 11:30 pm
Yes the pins are in different places between pickup and van !
I used the van bulb sockets you sent be a while back recently on my yamahasu, and they were pinned quite very wrong.
Good luck with the swap about, you don't need to cut any wires as you can declip the male spades from the sockets.
I used the van bulb sockets you sent be a while back recently on my yamahasu, and they were pinned quite very wrong.
Good luck with the swap about, you don't need to cut any wires as you can declip the male spades from the sockets.

HighlyJetted- Hijet Overdose
- Posts : 5595
Join date : 2009-10-06
Age : 41
Location : Cheshire -

Re: Pick-Up Rear Light Problems With Rusty Bulb Holders?? My Solution.
![]() by Guest Fri Dec 16, 2016 12:12 am
by Guest Fri Dec 16, 2016 12:12 am
I have sat down and worked out the pin positions now. I did it with my red Pickup. It was a bit of a fiddly job swopping the pins around but better than cutting and re-joining the wires.
I will post the drawings and terminal numbers and positions tonight hopefully.
I will post the drawings and terminal numbers and positions tonight hopefully.
Guest- Guest
Sponsored content
» Rear Brake light bulb PN?
» Rear bumper + rear light clusters
» Small side light bulb with headlamp housing?
» Rear fog light doesn't work
» Securing the rear light clusters?
» Rear bumper + rear light clusters
» Small side light bulb with headlamp housing?
» Rear fog light doesn't work
» Securing the rear light clusters?
Page 1 of 1
Permissions in this forum:
You cannot reply to topics in this forum|
|
|